Repairing leaking pool walls is defined as the process of diagnosing, sealing, and restoring breaches in a pool’s structural shell to stop water loss and prevent further damage. Pool wall leaks occur in concrete, gunite, fiberglass, and vinyl liner pools, each requiring different materials and techniques. Left untreated, even a small leak accelerates pool wall water damage, undermines the surrounding soil, and drives up your water bill. The good news is that most leaks fall into predictable categories, and the right repair approach depends on your pool’s construction material and the severity of the breach.
How do you identify and locate leaks in pool walls?
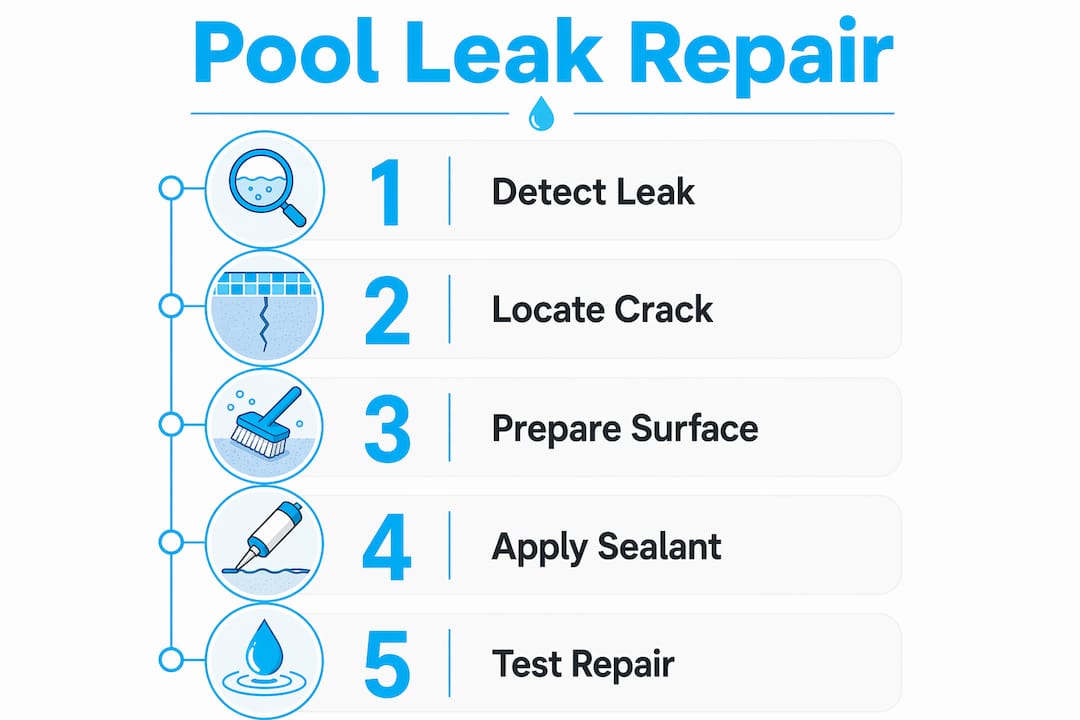
Accurate leak detection is the first step in any successful repair. Guessing the location wastes time and money, so start with a structured diagnostic process.
Step-by-step leak detection
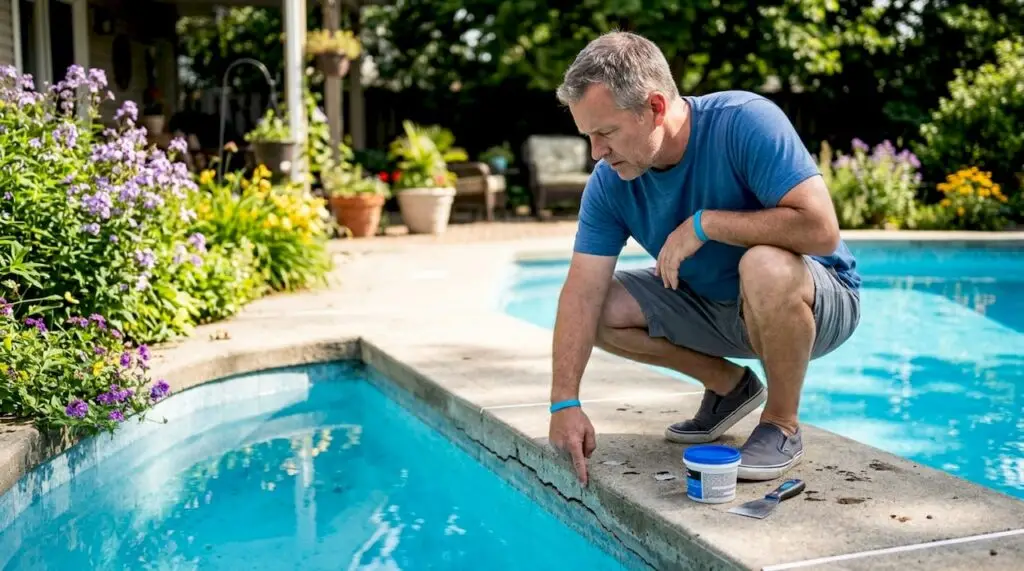
- Visual inspection. Walk the entire pool perimeter and look for cracks, bulges, staining, or wet soil around the shell. Pay close attention to corners, steps, and the waterline.
- Bucket test. Fill a bucket with pool water, set it on a step, and mark both the pool water level and the bucket water level. After 24 hours, compare the two. If the pool loses more water than the bucket, you have a leak beyond normal evaporation.
- Dye test. Squeeze a small amount of dye tracer near suspected cracks or fittings. If the dye streams toward a specific point, that is your leak location.
- Pressure testing. A licensed technician pressurizes the plumbing lines to confirm whether the leak is in the shell or underground pipes.
- Acoustic detection. Professionals use listening devices to pinpoint underground plumbing leaks that visual methods miss entirely.
Where leaks concentrate
Pool leaks mostly occur at construction details like pipe penetrations, light niches, and junctions rather than on large flat surfaces. That means your inspection should prioritize fittings and joints over the broad wall face.
Pro Tip: Run the dye test on a calm day with the pump off. Water movement disperses the dye and makes it nearly impossible to read the flow direction accurately.
Essential tools for leak detection
- Dye tracer syringes
- Submersible flashlight
- Bucket and permanent marker
- Pressure test gauge and plugs
- Acoustic listening device (professional use)
| Tool | Purpose |
|---|---|
| Dye tracer syringe | Confirms exact leak point at fittings or cracks |
| Bucket test setup | Separates evaporation from actual water loss |
| Pressure test gauge | Identifies leaks in underground plumbing lines |
| Acoustic detector | Locates hidden leaks without excavation |
What are the repair methods for concrete and gunite pool wall leaks?
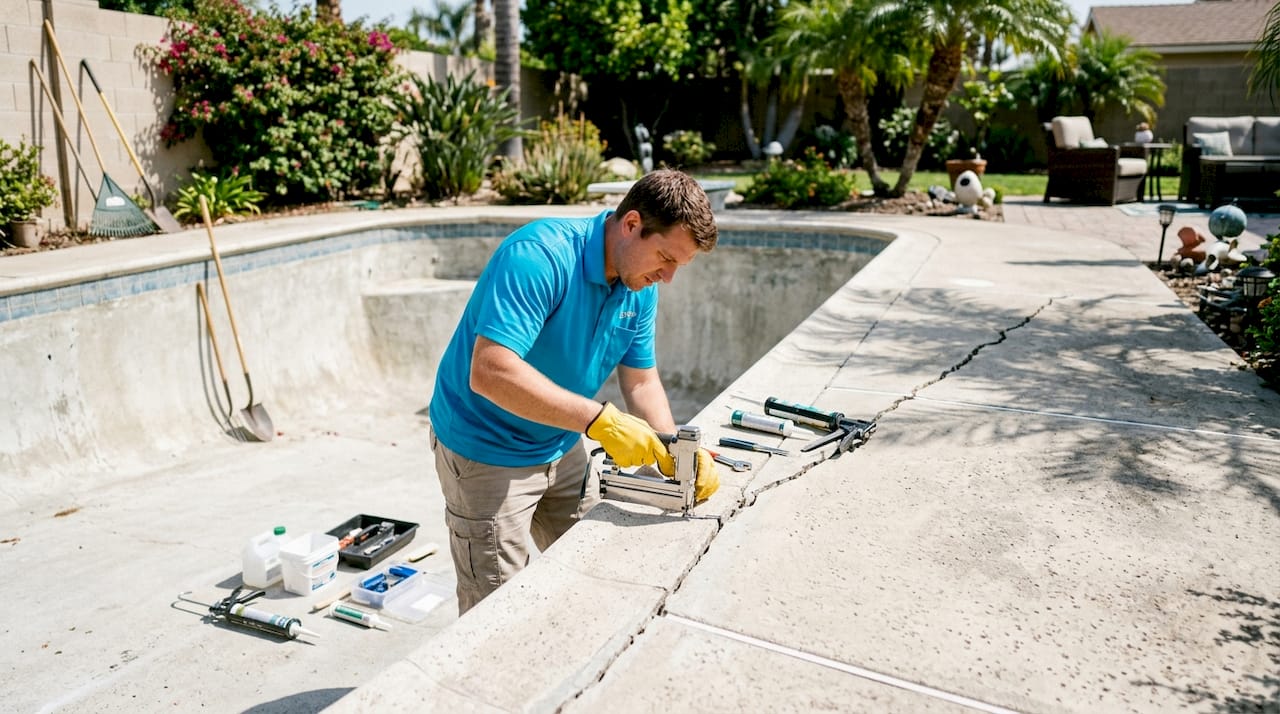
Concrete and gunite pools develop two distinct crack types, and the repair method depends entirely on which type you have. Cosmetic cracks are smaller than 1/8 inch and affect only the surface plaster. Structural cracks penetrate the shell and require more involved intervention.
Repairing hairline and cosmetic cracks
Underwater epoxy putty bonds directly to wet concrete, so you can fix minor cracks without draining the pool. Clean the crack with a wire brush, press the putty firmly into the void, and smooth the surface. The putty cures underwater and creates a watertight seal within hours.
For a more durable finish on drained pools, grind the crack into a “V” shape first. This gives the repair material more surface area to grip. Apply the epoxy in two passes, letting the first layer tack before adding the second.
Repairing structural cracks
Structural cracks require stainless steel staples bridging the crack at regular intervals, combined with epoxy injection to fill the void from the inside out. Stainless steel resists corrosion in chlorinated water and prevents the crack from widening again. This repair typically requires draining the pool and should not be attempted without experience, since improper staple placement can stress the surrounding shell.
Pro Tip: Before injecting epoxy into a structural crack, insert a backing rod into the deepest section. This prevents the epoxy from running through to the soil side and wasting material.
Expansion joint maintenance
Pool expansion joint mastic must be replaced every 3–5 years. When the sealant becomes hard, peels, or pulls away from the joint, water infiltrates and soil movement widens the gap. Hybrid silane-polyether sealants outperform standard epoxy or RTV silicone because they stay flexible and accommodate concrete movement without tearing. Always use a backing rod in the joint before applying sealant. A backing rod prevents three-sided adhesion, which causes the sealant to tear when the concrete shifts.
| Crack type | Repair method | Drain required? |
|---|---|---|
| Cosmetic (under 1/8 inch) | Underwater epoxy putty | No |
| Structural (through shell) | Epoxy injection + stainless steel staples | Yes |
| Expansion joint failure | Backing rod + hybrid silane-polyether sealant | Partial |
For more detail on surface preparation and long-term plaster care, the pool plaster cracking guide from Wefixuglypools covers the most common causes and solutions in depth.
How can homeowners repair fiberglass pool wall leaks effectively?
Fiberglass pools require extra caution during repairs because the shell is thin and ground pressure can cause serious structural damage if you rush the process.
Draining safely
Open the hydrostatic relief valves before you drain a fiberglass pool. These valves balance the ground water pressure against the shell. Without them open, the shell can lift or buckle as the water weight inside drops. This is the single most common cause of catastrophic fiberglass repair failures.
Step-by-step fiberglass wall repair
- Drain the pool with hydrostatic relief valves open. Monitor the shell for any movement as the water level drops.
- Assess the damage. Mark the full extent of the damaged area with a pencil. Damage often extends further than it appears on the surface.
- Relieve soil pressure. Fiberglass pool bulges result from soil pressure behind the shell. Remove excess backfill material around the affected section before patching to prevent the repair from failing again.
- Cut out the damaged section. Use an angle grinder to remove delaminated or cracked fiberglass back to solid material.
- Apply fiberglass mat layers. Saturate three layers of fiberglass mat with epoxy resin, applying each layer while the previous one is still tacky.
- Remove air bubbles. Roll each layer with a finned roller immediately after application. Trapped air bubbles compromise structural strength and create weak spots that fail under water pressure.
- Apply gelcoat. Use a color-matched gelcoat to finish the surface. Blend the edges carefully to minimize visible repair lines.
- Backfill and refill. Replace the backfill material in layers, then refill the pool slowly while monitoring the repaired section for movement.
Pro Tip: Mix your epoxy resin in small batches. Large batches generate heat as they cure, which accelerates the working time and can cause the resin to gel before you finish applying a full layer.
How to fix leaks in vinyl liner pools and around fittings and penetrations?
Vinyl liner pools and the fittings in any pool type share a common vulnerability: the seals and gaskets that hold everything together degrade over time. Addressing these details correctly prevents repeat leaks.
Patching vinyl liner tears
- Underwater vinyl patch kits work on small tears without draining. Clean the area, cut a rounded patch (no corners to peel), apply the adhesive, and press firmly for two minutes.
- For larger tears or tears near fittings, drain below the damage level before patching. A dry surface creates a stronger bond.
- Replace the liner entirely if tears are widespread or the material has become brittle. Repeated patching of an aged liner is a short-term fix.
Fixing leaking skimmers and return fittings
A leaking skimmer gasket requires draining the pool below the skimmer level, removing the faceplate, replacing the gasket, and resealing with silicone. This repair typically takes 2–3 hours and uses inexpensive parts. The key mistake homeowners make is reusing the old gasket because it looks intact. Gaskets compress and lose their seal over time even without visible damage.
Standard plumbing tape degrades quickly in chlorinated water and causes fitting leaks to return within one season. Always use a pool-safe thread sealant on any threaded fitting inside or around the pool.
Pro Tip: When reassembling a skimmer, hand-tighten the faceplate screws in a cross pattern, then add a quarter turn with a screwdriver. Over-tightening cracks the faceplate and creates a new leak point.
Sealing light niches and pipe penetrations
Effective waterproofing at light niches and pipe penetrations uses elastic tapes and collars, not standard caulk. The collar wraps around the pipe and bonds to the surrounding shell, creating a flexible seal that moves with the pool without cracking. For a solid overview of how proper pool wall sealing at junctions prevents long-term leaks, the principles apply across all pool types.
| Fitting type | Repair method | Common mistake |
|---|---|---|
| Skimmer | Drain below level, replace gasket, reseal | Reusing compressed gasket |
| Return fitting | Pool-safe thread sealant on threads | Using standard plumbing tape |
| Light niche | Elastic collar and waterproof tape | Applying standard caulk |
| Pipe penetration | Flexible collar bonded to shell | Rigid sealant that cracks with movement |
Key takeaways
Repairing leaking pool walls requires matching the repair method to the pool material, using the correct sealants, and addressing fittings and penetrations before broad wall surfaces.
| Point | Details |
|---|---|
| Detect before you repair | Use the bucket test and dye test to confirm and locate the leak before buying materials. |
| Match method to material | Concrete needs epoxy or staples; fiberglass needs mat and resin; vinyl needs patch kits or gasket replacement. |
| Prioritize fittings and joints | Most leaks originate at pipe penetrations, light niches, and skimmer gaskets, not flat wall surfaces. |
| Use pool-grade sealants | Standard plumbing tape and common caulk fail in chlorinated water; use pool-safe thread sealants and hybrid sealants. |
| Replace expansion joint mastic | Inspect and replace mastic every 3–5 years to prevent water infiltration and soil movement damage. |
What I’ve learned after years of watching pool repairs fail
After working on hundreds of pool repairs across the Phoenix area, the pattern I see most often is not a bad repair technique. It is the wrong sealant for the job. Homeowners pick up a tube of silicone from the hardware store, apply it to an expansion joint or a light niche, and feel confident the problem is solved. Within one season, the silicone has pulled away, the leak is back, and now there is old sealant residue making the next repair harder.
The second most common failure is skipping the hydrostatic relief valve step on fiberglass pools. I have seen shells buckle because a homeowner drained the pool quickly on a day when the water table was high. That repair costs far more than the original leak would have.
The honest truth about pool leaks is that most of them are small and fixable early. The ones that become expensive are the ones that get ignored for a season or two. Soil erodes, rebar corrodes, and a hairline crack becomes a structural problem. Regular inspection, especially around fittings and expansion joints, catches the vast majority of issues before they escalate. If you are not sure what you are looking at, a professional assessment is worth the cost. Wefixuglypools offers pool repair services across the Greater Phoenix area, and a diagnostic visit is far cheaper than a structural repair.
— Brian
Wefixuglypools: expert repair and remodeling in the Phoenix area
When a leak goes beyond a DIY patch, or when you want the repair done right the first time, Wefixuglypools brings a decade of hands-on experience to every project.
We specialize in pool remodeling and repair across Scottsdale, Surprise, and the Greater Phoenix area. Whether you need a structural crack addressed, a full pool remodeling service, or a complete shell assessment, our team has completed hundreds of transformations and knows exactly what each pool type demands. Reach out for a consultation and get a clear picture of what your repair actually requires, with no guesswork and no surprises.
FAQ
What is the fastest way to fix a pool wall leak?
Underwater epoxy putty is the fastest fix for minor concrete cracks because it bonds to wet surfaces without draining the pool. For vinyl liners, an underwater patch kit delivers a similar quick result.
How do I know if my pool is leaking or just evaporating?
The bucket test is the standard method. If your pool loses more water than an identical volume in a bucket over 24 hours, the pool has a leak beyond normal evaporation.
Can I repair leaking pool walls without draining the pool?
Minor cosmetic cracks in concrete and small vinyl liner tears can be repaired without draining. Structural cracks, skimmer gaskets, and fiberglass repairs require at least partial draining.
How often should expansion joints be resealed?
Pool expansion joint mastic should be replaced every 3–5 years. Inspect the joint annually for hardening, peeling, or gaps.
When should I call a professional to fix pool wall leaks?
Call a professional when the crack penetrates the shell, when the pool loses water rapidly, or when standard repairs have already failed. Professional pressure testing and acoustic detection locate stubborn underground leaks that visual methods cannot find.