Restoring a peeling pool finish is the process of removing damaged surface material, preparing the substrate, and applying a new coating or plaster to return the pool to a safe and attractive condition. Peeling is the visible result of a deeper problem. Peeling plaster signals moisture intrusion that can compromise the structural integrity of your pool shell if left alone. The industry term for this condition is delamination, which describes the separation of a finish layer from the substrate beneath it. Whether you are dealing with a few flaking patches or widespread surface failure, the right fix depends on how much damage exists and which finish material your pool uses. Tools like epoxy patch kits, hydraulic cement, and pool plaster are the core materials for repair, while professional resurfacing uses quartz aggregate or pebble finishes for long-term results.
How to restore peeling pool finish: assessing the damage first
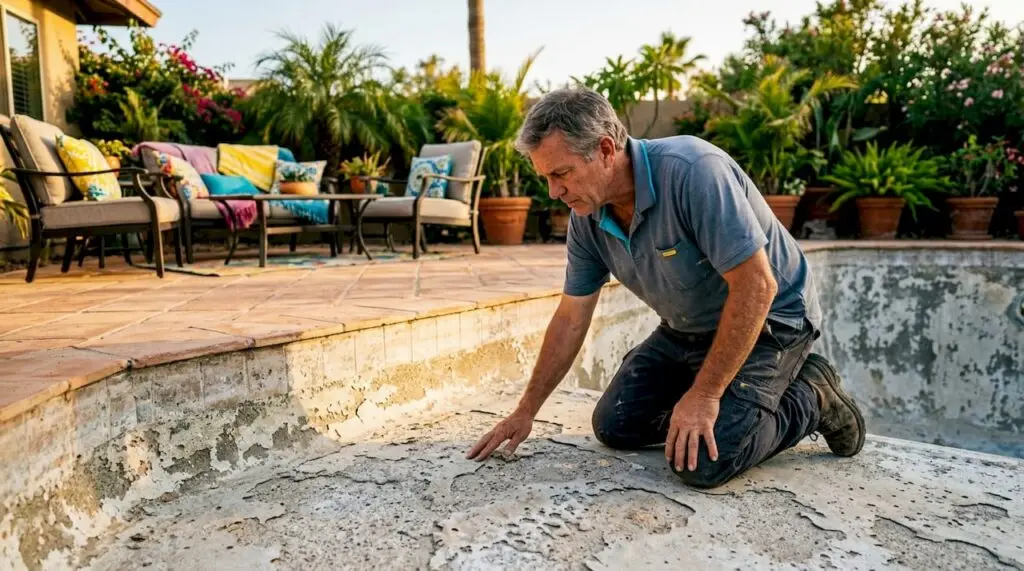
The first step to fix a peeling pool surface is understanding exactly what you are dealing with. Not all peeling looks the same, and the type of damage determines whether you can handle it yourself or need a professional.
Types of damage to identify:
- Hairline cracks: Thin surface cracks that do not penetrate deep into the shell. These are the most manageable for DIY repair.
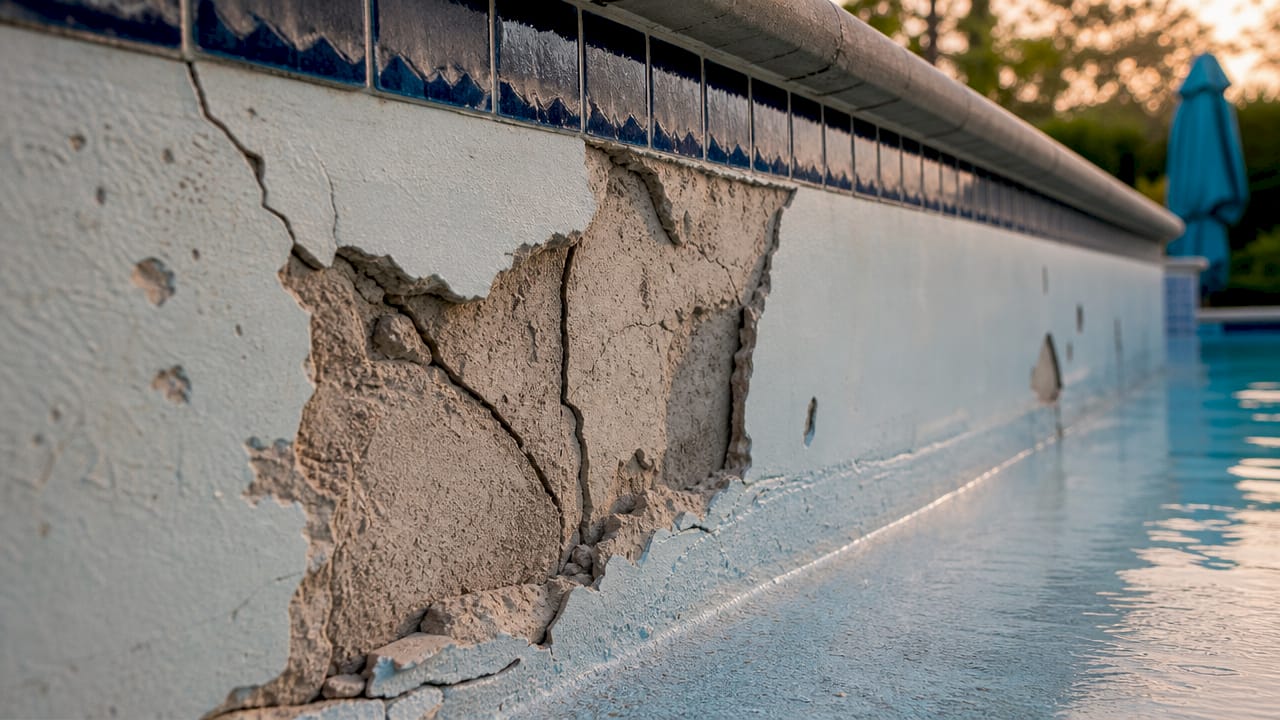
- Spalling: Chunks of plaster breaking away, leaving rough, pitted areas. This indicates the finish has aged past its useful life.
- Delamination: The finish layer separates from the shell in sheets or bubbles. This is a serious condition requiring professional attention.
- Flaking: Small pieces peeling away, often caused by chemical imbalance or incompatible coatings.
Run your hand across the pool surface when it is drained or at a low water level. Soft, hollow spots that flex under pressure signal delamination beneath the surface. Hard, rough patches with sharp edges point to spalling. A visual inspection under bright light reveals hairline cracks that are easy to miss in normal conditions.
Small cracks and minor patches can often be repaired as a DIY project, but widespread delamination or large structural cracks require professional repair or full resurfacing. That distinction saves you from spending money on a patch that fails within a season.
| Damage Type | DIY Feasible? | Recommended Action |
|---|---|---|
| Hairline cracks | Yes | Epoxy or hydraulic cement patch kit |
| Minor flaking | Yes | Surface patch and seal |
| Spalling (small area) | Possibly | Patch kit; monitor for spread |
| Widespread delamination | No | Professional resurfacing |
| Structural cracks | No | Professional evaluation and repair |
Pro Tip: Tap the pool surface with a coin or screwdriver handle. A hollow sound means the finish has separated from the shell beneath. Mark those areas with tape before draining so you do not lose track of them.
Step-by-step DIY repairs for small peeling areas
DIY patching works well for isolated damage covering less than a few square feet. The key is thorough preparation. Skipping prep is the single most common reason patches fail within months.
Tools and materials you will need:
- Pool plaster patch kit or epoxy putty (kits range from $29.99 to $299.99 depending on coverage area)
- Wire brush or angle grinder with a diamond cup wheel
- Chisel and hammer for removing loose material
- Pool surface cleaner or muriatic acid solution
- Mixing bucket and trowel
- Wet/dry vacuum
Step-by-step repair process:
- Drain or lower the water level below the damaged area by at least six inches.
- Remove all loose material using a chisel and hammer. Tap around the edges of the damaged area and remove anything that sounds hollow.
- Grind the edges of the repair area with an angle grinder to create a rough, clean surface. Mechanical profiling or sandblasting creates a stronger bond than chemical cleaning alone.
- Feather the edges of the repair zone at a shallow angle. Feathering edges creates smooth transitions between old and new surfaces, preventing future lifting under water pressure.
- Clean the area with a pool surface cleaner or diluted muriatic acid. Rinse thoroughly and allow to dry completely.
- Mix your patch material according to the manufacturer’s instructions. Most epoxy putties have a two-part mix ratio that must be exact.
- Apply the patch with a trowel, pressing firmly into the repair area. Work from the center outward to avoid air pockets.
- Smooth and blend the surface so the patch sits flush with the surrounding finish.
- Allow full cure time before refilling. Most patch materials require 24–72 hours of dry cure time.
Common mistakes to avoid:
- Patching over wet or damp surfaces
- Skipping edge feathering, which causes the patch to lift
- Refilling the pool before the patch fully cures
- Using incompatible materials over existing pool paint
Pro Tip: Moisture trapped beneath coatings is the leading cause of repeat peeling. If your pool sits in a high water table area, allow an extra 24 hours of drying time beyond what the product label recommends.
When does a pool need professional resurfacing?

Professional resurfacing is the right choice when damage covers a large portion of the pool surface, when structural cracks are present, or when the finish has simply reached the end of its lifespan. Standard plaster finishes last 8–12 years, while quartz aggregate finishes last 12–18 years and pebble aggregate finishes last 18–25 years. If your pool is approaching those milestones, patching is a short-term fix on a surface that needs full replacement.
Signs you need professional resurfacing:
- Delamination covers more than 20% of the pool surface
- Cracks run through the shell, not just the finish layer
- The surface feels rough enough to scratch skin
- Multiple patch attempts have failed in the same area
- The finish is staining permanently despite chemical treatment
The professional resurfacing process starts with draining the pool completely. Crews then chip away the old finish using jackhammers or grinders, exposing the bare shell. Surface preparation at this stage is more critical than the finish product itself. A poorly prepared shell will cause any new finish to fail prematurely, regardless of its quality.
After profiling the substrate, crews apply a bonding agent and then the new finish material. The pool is then filled slowly to cure the new surface under water, which prevents shrinkage cracks.
| Repair Method | Typical Cost | Best For | Lifespan |
|---|---|---|---|
| DIY patch kit | $29.99–$299.99 | Hairline cracks, small flaking | 1–3 years per patch |
| Professional patch repair | $500–$2,000 | Moderate localized damage | 3–7 years |
| Full replastering | $5,000+ | Aged or widespread plaster failure | 8–12 years |
| Full fiberglass resurfacing | $8,000–$15,000+ | Fiberglass pools with delamination | 15–25 years |
Pro Tip: Get at least three quotes from licensed pool contractors before committing to a full resurface. Ask each contractor to specify the finish product by brand and confirm the prep method. Vague answers about surface preparation are a red flag.
You can also review pool service vs. DIY options to help decide which path fits your situation and budget before calling a contractor.
How to maintain your pool finish after restoration
A restored pool finish lasts as long as you take care of it. Neglecting water chemistry after resurfacing is the fastest way to shorten the life of any new finish.
Ongoing maintenance practices that protect your investment:
- Test water chemistry weekly. Keep pH between 7.2 and 7.6. Water that is too acidic etches plaster and accelerates peeling. Water that is too alkaline causes scaling that traps moisture against the surface.
- Brush the pool walls twice a week for the first month after resurfacing. New plaster releases calcium during the curing process, and brushing prevents it from bonding to the surface as scale.
- Avoid abrasive cleaning tools. Wire brushes and pressure washers damage finished surfaces. Use a nylon brush and a pool-safe surface cleaner instead.
- Inspect the surface seasonally. In Arizona, the intense summer heat causes pool water to evaporate faster, which concentrates chemicals and stresses the finish. Check for early signs of etching or discoloration before they develop into peeling.
- Never let the pool sit empty for extended periods. An empty pool shell is exposed to ground moisture pressure from below, which can cause new finishes to blister and lift.
- Avoid painting over plaster or quartz finishes unless you use a product specifically formulated for that surface. Incompatible coatings are a primary cause of repeat peeling failures.
Catching early signs of finish degradation, such as rough patches, faint staining, or small soft spots, means you can address them with a minor repair rather than a full resurface. Regular pool deck maintenance also reduces debris and chemical runoff that can accelerate surface wear at the waterline.
Key takeaways
Restoring a peeling pool finish requires accurate damage assessment, thorough surface preparation, and matching the repair method to the scale of the problem.
| Point | Details |
|---|---|
| Assess before acting | Identify damage type (hairline, spalling, delamination) before choosing a repair method. |
| Prep determines success | Mechanical profiling and feathering edges matter more than the patch product itself. |
| Match method to damage | DIY kits suit small areas; professional resurfacing is required for widespread delamination. |
| Know the cost range | DIY kits start at $29.99; full professional resurfacing can reach $15,000 or more. |
| Maintain after restoration | Weekly chemistry testing and seasonal inspections prevent early finish failure. |
What I have learned from watching homeowners tackle this the wrong way
After years working with pool owners in the Greater Phoenix area, the pattern I see most often is this: a homeowner notices a few peeling patches, buys a patch kit, applies it without proper prep, and calls us six months later because the new patch is already lifting. The problem was never the product. It was the preparation.
The part most homeowners underestimate is how much work goes into the surface before anything gets applied. Grinding, feathering, cleaning, and drying are not optional steps you can rush. They are the entire job. The patch material is almost secondary.
I also see homeowners delay action because the peeling looks minor. That is a costly mistake. Peeling plaster indicates moisture penetration risk that compounds over time. What starts as a $200 patch repair becomes a $10,000 resurface if the shell absorbs water for two more seasons.
My honest advice: if the damage covers more than a few isolated spots, get a professional assessment before spending money on DIY materials. A qualified contractor can tell you in 20 minutes whether patching is worth it or whether you are throwing money at a surface that needs full replacement. Acting early is always cheaper than waiting.
— Brian
Wefixuglypools can handle what DIY cannot
When the damage goes beyond what a patch kit can fix, you need a team that has done this hundreds of times.
Wefixuglypools has spent over a decade transforming worn, unsafe pools across the Greater Phoenix area into clean, durable, and visually appealing spaces. From targeted pool repair services to complete pool remodeling and resurfacing, we handle every stage of the process, including surface prep, finish selection, and long-term care guidance. If you are in the Phoenix area and your pool finish has reached the point where professional help makes more sense than another patch, we are ready to take a look and give you a clear, honest assessment.
FAQ
What causes pool finish to peel?
Pool finish peels due to moisture trapped beneath the surface, incompatible coatings, chemical imbalance, or a finish that has exceeded its lifespan. Acidic water and improper surface preparation during previous repairs are the most common triggers.
Can I repair pool plaster without draining the pool?
Underwater epoxy patch kits allow minor repairs without draining, but surface preparation is limited and bond strength is reduced. Full draining produces a stronger, longer-lasting repair for anything beyond a hairline crack.
How long does a professional pool resurface last?
Standard plaster lasts 8–12 years, quartz aggregate lasts 12–18 years, and pebble aggregate finishes last 18–25 years with proper water chemistry maintenance.
How do I know if my pool needs resurfacing or just patching?
If damage is isolated to a few small areas, patching is appropriate. Widespread delamination or structural cracks signal that full resurfacing is the only durable solution.
What is the most important step in a DIY pool patch repair?
Surface preparation is the most critical step. Removing all loose material, grinding the edges, and allowing the area to dry completely before applying any patch material determines whether the repair holds or fails.