Light, flaky calcium scale usually comes off with a white vinegar soak mixed evenly with water or a wet pumice stone and some elbow grease. Hardened, crystalline buildup typically needs diluted muriatic acid, a commercial descaler, or professional media blasting. Whichever route you take, follow pool-chemical safety rules and check your water chemistry before and after treatment.
TL;DR:
- A deposit that wipes away with a fingernail is usually soft calcium carbonate; hard, cementlike crystalline buildup is likely calcium silicate and needs stronger treatment.
- Test a hidden tile patch first: wet pumice suits plaster and many unglazed tiles, but can scratch glazed ceramic, glass, and vinyl.
- Avoid CLR because it is not recommended around pools and can react with chlorine to produce hazardous fumes; choose descalers made for pools.
- For stubborn scale, use a 1:10 acid to water dilution; add acid to water outdoors, upwind, and wear gloves and eye protection.
- Test pH weekly and calcium hardness monthly; keep pH at 7.2 to 7.6 during treatment, and avoid calcium hypochlorite shock when hardness is high.
Table of Contents
- What Calcium Scale Is and How It Forms on Pool Tile
- DIY Methods: Vinegar, Pumice, Tile Erasers, and Pool-Safe Descalers
- Muriatic Acid, Liquid Descalers, and Professional Media Blasting
- Safety Rules and the Water Chemistry That Makes Treatment Work
- Routine Testing and Maintenance to Keep Calcium From Returning
- When Professional Treatment Makes the Difference
- Identifying Calcium Buildup on Tile Versus Other Pool Surfaces
- Preparing Pool Tile Before You Start Removing Calcium
- Protecting Tile and Preventing Calcium From Coming Right Back
- Calcium Scale Versus Metal Stains, Algae, and Other Tile Discoloration
- When DIY Makes Sense and When to Call a Pro
- How We Can Help With Stubborn Calcium and Tile Damage
- FAQ
- Sources
What Calcium Scale Is and How It Forms on Pool Tile
Calcium scale on pool tile shows up in two forms, and telling them apart saves you time and tile. Calcium carbonate is the softer, chalky, white deposit that often wipes away with gentle methods. Calcium silicate is the hard, gray-white, crystalline buildup that bonds tightly to the tile surface and resists most household cleaners.
Several conditions push calcium out of the water and onto your waterline:
- High pH or high total alkalinity, which pushes the water toward scale formation.
- High calcium hardness, often from hard fill water or well water.
- Frequent use of calcium hypochlorite (cal-hypo) shock, which adds calcium with every dose.
- Poor circulation near the tile line, which lets minerals settle instead of staying suspended.
If your scale wipes off with a fingernail or soft cloth, you’re almost certainly dealing with calcium carbonate, and a gentle DIY method will likely work. If it feels like dried cement and won’t budge under light scrubbing, you’re probably looking at calcium silicate, which may need stronger acid treatment or a professional blast.
DIY Methods: Vinegar, Pumice, Tile Erasers, and Pool-Safe Descalers
Before you touch a single tile, do three things: identify your tile material (glazed ceramic, glass, natural stone, or unglazed concrete/pebble), test your chosen method on a small, inconspicuous area, and gather your gear. You’ll want rubber gloves, eye protection, a soft-bristle pool brush or old toothbrush, a bucket, and a hose for rinsing.
Pro Tip: Always test any cleaning method on a hidden section of tile first. Some glazes etch or dull faster than you’d expect, and a two-minute test beats a redone tile job.
Work through these methods in order, from gentlest to strongest:
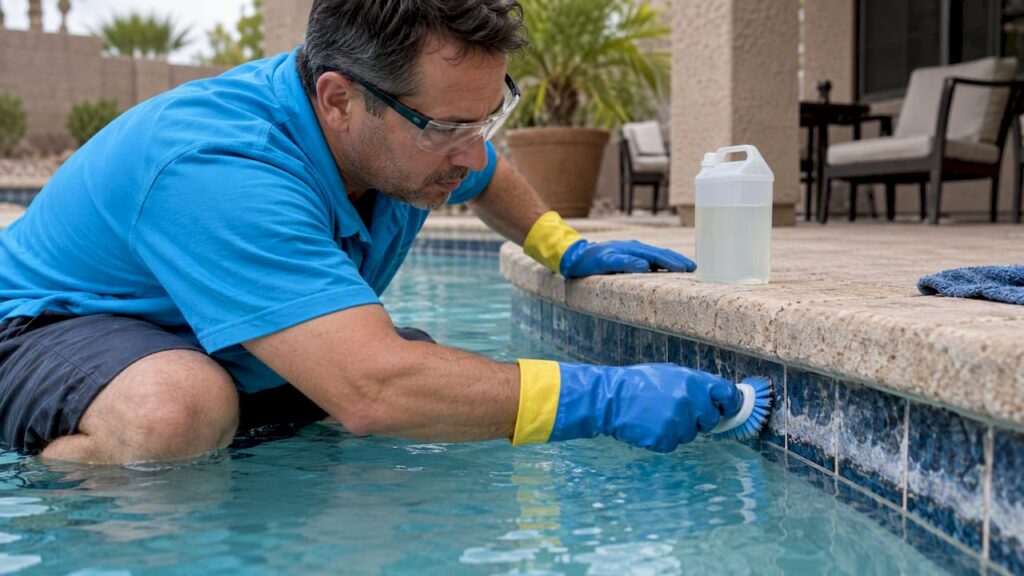
- Vinegar soak. Mix white vinegar and water 1:1 in a spray bottle or bucket. Apply directly to the scale, let it sit 10 to 15 minutes, then scrub with a pool brush or toothbrush and rinse thoroughly with clean water.
- Baking soda paste. For light residue, mix baking soda with a small amount of water into a paste, apply, let sit briefly, then scrub gently and rinse. This works best as a follow-up to vinegar rather than a standalone fix for heavier scale.
- Wet pumice stone. Keep both the pumice stone and the tile surface wet at all times, since a dry stone can scratch or etch permanently, according to cleaning guidance from The Tile Shop. Rub in small circular strokes rather than straight lines, checking your progress often. Pumice works well on plaster, concrete, and many unglazed tiles, but avoid it on glazed ceramic, glass tile, and vinyl pool liners.
- Tile erasers and nonabrasive cleaners. For glazed glass tile or vinyl surfaces where pumice is too aggressive, a dedicated tile eraser or a nonabrasive pool-safe cleaner removes light to moderate scale without dulling the glaze.
- Commercial pool descalers. Products formulated specifically for pools, often based on sulfamic or phosphoric acid rather than household acids, are worth reaching for when vinegar and pumice stop making progress but the scale still isn’t fully hardened. These are built to work safely around pool chemistry, unlike general household cleaners.
Mineral Tiles’ removal guidance notes that light to moderate calcium carbonate typically responds well to the vinegar and pumice combination, while heavier, persistent silicate scale often needs a stronger approach. If you’ve worked through this list carefully and the deposit is still holding on, you’re likely dealing with calcium silicate, and it’s time to move to the stronger methods below.
One important note on household cleaners: products like CLR are popular for calcium, lime, and rust around the house, but CLR itself states that its formula is not recommended for use in or around swimming pools, including pool tile. It can react with chlorine and other pool chemicals to create hazardous fumes, and it may damage tile finishes. Stick to products formulated for pool use instead.
Muriatic Acid, Liquid Descalers, and Professional Media Blasting
When gentle methods can’t touch hardened calcium silicate, stronger chemical treatment or professional equipment becomes the practical next step.
- Muriatic acid (spot treatment). A conservative starting point is a 1:10 acid-to-water dilution for spot work on tile, according to Mineral Tiles. Always add the acid to the water, never the reverse, mix outside and upwind of the pool, wear gloves and eye protection, and neutralize any spills immediately.
- In-pool liquid descalers. Dosing guidance from pool-care sources suggests at least a half-gallon for an initial treatment on a standard-size pool, based on Poolie’s cleaning guidance, with smaller weekly maintenance doses afterward for larger or recurring problems. Keep the pump and filter running during and after treatment so the product circulates and the dissolved minerals get filtered out.
- Professional media or bead blasting. For calcium silicate that resists repeated acid treatments, media blasting with glass beads or soda media removes the bonded layer without the aggressive grinding that manual scraping requires, which protects the tile and grout underneath.
Expect a professional descaling visit to involve an inspection, water balancing, the blasting or chemical treatment itself, and a final rinse and chemistry check, typically completed in a single visit for moderate cases. The time and cost involved is usually worth it once you’re facing silicate scale that has survived multiple acid passes, since repeated manual scraping risks the tile glaze and grout lines more than a single professional treatment does.
Safety Rules and the Water Chemistry That Makes Treatment Work
Treating calcium scale safely matters as much as treating it effectively. Keep this checklist close by whenever you’re working with acids or descalers:
- Wear chemical-resistant gloves and eye protection at minimum, and add a respirator mask when working with concentrated muriatic acid.
- Always add chemicals to water, never water to chemicals, a rule New York’s Department of Health emphasizes specifically because reversing the order can trigger dangerous splashing or reactions.
- Never mix different pool chemicals together, and never let acid-based cleaners contact chlorine products.
- Store and dispose of chemicals exactly as the label instructs, and keep them away from children and pets.
Household cleaners aren’t pool cleaners: CLR’s own product guidance warns against use in or around swimming pools because contact with pool chemicals can create toxic fumes. That one label warning covers a mistake a lot of homeowners make without realizing it.
For the treatment itself to work, your water chemistry needs to cooperate. Lowering total alkalinity to roughly 60 to 80 parts per million and keeping pH around 7.2 to 7.6 during descaling makes the water slightly more aggressive toward existing scale, which helps treatments actually dissolve it. Keep the filter running, avoid adding chlorine during treatment, and ensure swimmers wait until your chemistry returns to normal.
Routine Testing and Maintenance to Keep Calcium From Returning
Prevention costs far less effort than another round of scraping and acid. A steady testing routine is the backbone of that prevention:
- Test pH weekly and adjust toward the 7.2 to 7.6 range.
- Test calcium hardness monthly, and check total alkalinity weekly or right before any descaling treatment.
- Avoid cal-hypo shock products when your calcium hardness is already running high, since each dose adds more calcium to the water.
- Use a hose filter on fill water if your tap water runs hard, and consider a weekly stain-and-scale control product as ongoing insurance.
Pool chemistry guidance from Trouble Free Pool points to regular testing and balancing as the most effective way to avoid heavy descaling work down the road. A quick weekly brush along the waterline tile, combined with spot treatment the moment you notice new scale forming, keeps small problems small. If scale keeps coming back despite consistent testing and balancing, that pattern itself is worth a professional inspection, since it usually points to a chemistry or circulation issue beyond the tile itself.
When Professional Treatment Makes the Difference
Severe calcium silicate scale that has resisted vinegar, pumice, and multiple acid passes is exactly the kind of case where pool remodeling specialists step in with media blasting equipment designed for the job. We handle tile repair and replacement, full resurfacing, and long-term prevention planning for pools where DIY descaling has reached its limit or where the tile itself has already suffered damage from scale or from aggressive scraping.
Pools that arrive with years of untreated calcium buildup often need more than a blast treatment. They need a honest look at whether the tile and grout underneath are still sound enough to save.
For pool owners weighing a persistent calcium problem against the cost of professional help, that assessment is usually the deciding factor.
Identifying Calcium Buildup on Tile Versus Other Pool Surfaces
Calcium scale on tile looks and behaves differently than scale on plaster, pebble finishes, or pool equipment, and that difference matters for how you treat it. On tile, calcium typically appears as a visible ring right at the waterline, where evaporation concentrates minerals day after day. It often has a rough, sandpaper-like texture when it’s calcium silicate, or a soft, chalky white coating when it’s calcium carbonate.
On plaster or pebble-finish pool surfaces below the waterline, calcium tends to show up as a cloudy, grayish haze across a broader area rather than a defined line, since it forms wherever water chemistry is off rather than concentrating at one edge. On metal fixtures like ladders, rails, or light rings, mineral buildup often looks flakier and combines with corrosion, producing a rougher, more textured deposit than the smoother scale found on tile.
The waterline concentration is the biggest tell. If the deposit tracks precisely along the tile band where water meets air, and tapers off below it, you’re looking at classic calcium scale rather than a broader water-quality stain. That precision also means waterline tile often needs attention well before the rest of the pool shows any mineral problem at all, so check that band first during routine inspections.
Preparing Pool Tile Before You Start Removing Calcium
A few minutes of prep work makes every removal method more effective and protects the tile while you work. Start by brushing away loose debris, algae, or surface dirt with a soft pool brush, since any grime left on the tile can interfere with how vinegar, pumice, or acid contacts the actual scale.
Next, lower the water level a few inches below the waterline if you plan to work directly on dry tile, which gives you a clean working surface and keeps cleaning chemicals from diluting into the pool water unnecessarily. If you’re treating tile while it stays submerged or partially wet, that’s fine too, but keep in mind that any acid-based product will interact with your pool water, so you’ll need to rebalance chemistry afterward regardless.
Rinse the target area with clean water and let it sit for a few minutes so you can see the true extent and texture of the scale without surface residue clouding your assessment. This is also the moment to do your small test patch, checking how the glaze or grout responds before you commit to a full waterline treatment.
Finally, lay out your tools and PPE within reach: your chosen cleaner, brush or pumice stone, gloves, eye protection, and a hose for rinsing. Having everything staged before you start keeps you from touching contaminated gloves to doorknobs or faucets mid-job, and it keeps the whole process moving while your test patch results are still fresh in mind.

Protecting Tile and Preventing Calcium From Coming Right Back
Removing the scale is only half the job. What you do in the hours and weeks afterward determines whether it returns in a month or stays gone for a season or longer.
Rinse the treated tile thoroughly with clean water immediately after any vinegar, pumice, or acid treatment, since leftover residue can interact unpredictably with pool chemicals once you refill or rebalance. Then retest your water chemistry right away. If you lowered alkalinity or pH to help a descaling treatment work, bring both back to their normal maintenance ranges of 7.2 to 7.6 for pH and 80 to 120 parts per million for alkalinity before swimmers return.
Keep the filter running for a full cycle after any in-pool descaling product, since this clears dissolved minerals before they have a chance to resettle on the exact surface you just cleaned. Skipping this step is one of the most common reasons scale seems to reappear within days rather than months.
Going forward, a light weekly brushing of the waterline tile keeps new mineral deposits from bonding before they harden into the crystalline form that’s so much harder to remove. Pair that habit with the monthly calcium hardness testing covered earlier, and you’ll catch rising hardness before it turns into another full descaling project.
Calcium Scale Versus Metal Stains, Algae, and Other Tile Discoloration
Not every mark on your waterline tile is calcium, and treating the wrong problem wastes time and risks the tile finish. Calcium scale is raised and textured, something you can feel with a fingertip even when you can’t quite tell by looking. Metal stains, by contrast, are flat discoloration, often rust-brown, blue-green, or black depending on whether iron, copper, or manganese is the culprit, and they sit on the surface rather than building up on top of it.
Algae staining tends toward green, yellow, or black patches that feel slippery or slimy rather than gritty, and it typically responds to brushing and shock treatment rather than acid or pumice. If a stain wipes away with a chlorine-soaked rag and doesn’t come back after a shock treatment, it was likely algae or organic buildup, not calcium.
A simple test helps when you’re unsure: dab a small amount of dry powdered vitamin C or a commercial stain test kit on the mark. Metal stains typically lighten or disappear, while calcium scale is unaffected because it’s a mineral deposit, not a stain bonded to the surface. If you’re dealing with a glazed tile that’s also showing dulling or etching alongside the deposit, that’s a different issue entirely, closer to the surface-wear concerns covered in marble etching repair guidance from Manny’s Ceramic Pro Touch, which is worth a look before you reach for anything abrasive on a glazed finish.

When DIY Makes Sense and When to Call a Pro
If scale is light, confined to a small area, and your tile is in good shape, start with vinegar or wet pumice. If it’s hardened, spread across a large section, or you’re uneasy handling acid, bring in a pro. Ask about bead-blasting experience, tile repair capability, timeline, and warranty before you commit.
— Brian
How We Can Help With Stubborn Calcium and Tile Damage
When calcium scale has hardened past what vinegar, pumice, or even careful acid treatment can handle, or when years of buildup have already damaged the tile or grout underneath, that’s the kind of project professional pool specialists often handle. Our team handles media blasting for heavy calcium silicate, tile repair and replacement where the surface is too far gone to save, and full resurfacing when scale damage extends beyond the waterline band.

Ongoing maintenance plans that pair water-chemistry monitoring with routine tile care help prevent the same buildup from returning the following season. If you’re staring at a waterline that vinegar and pumice haven’t touched, our pool services page is the fastest way to request an inspection and get a straight answer on what it’ll take to fix it.
FAQ
What is the best calcium remover for pool tile?
For light, chalky calcium carbonate, a 1:1 white vinegar solution or a wet pumice stone handles most cases without damaging the tile. For hardened calcium silicate, a commercial pool descaler or diluted muriatic acid works better, and professional media blasting is the most reliable option for deposits that resist both.
Can I use CLR on pool tile?
No. CLR’s own product guidance states the product is not recommended for use in or around swimming pools, including pool tile, because it can react with chlorine and other pool chemicals to create hazardous fumes. Stick to descalers formulated specifically for pool use instead.
Will muriatic acid remove calcium deposits from pool tile?
Yes, diluted muriatic acid can dissolve calcium deposits, particularly hardened calcium silicate that gentler methods can’t touch. A conservative starting ratio is 1:10 acid to water for spot treatment, according to Mineral Tiles, and it should always be mixed by adding acid to water, never the reverse, while wearing gloves and eye protection.
What causes calcium buildup on pool tile?
Calcium buildup forms when pH, total alkalinity, or calcium hardness run too high, often made worse by hard fill water or frequent cal-hypo shock use. The minerals come out of solution and settle at the waterline, where evaporation concentrates them fastest.
Sources
- Fact Sheet: Swimming Pool Chemicals–Safe Storage, Handling and Emergency Response
- How to Remove Calcium Buildup on Pool Tiles | Mineral Tiles