If your pool is losing water, the most likely causes are a low water level, a jammed basket, a stuck weir door, a worn gasket, or a suction-side air leak, and sometimes a cracked skimmer body. Start by checking the water level and pulling the basket for inspection. If those quick checks don’t solve it within a few minutes, move on to a 24-hour evaporation test to confirm whether you’re dealing with a true leak.
TL;DR:
- Run the bucket test for 24 hours with the autofill off; a greater drop in the pool than in the bucket points to a leak.
- Water loss above 2 inches per week, or 3 inches in hot, dry climates, usually signals a leak rather than normal evaporation.
- When replacing a faceplate gasket, tighten screws in an alternating pattern by hand, replace the full set, and do not substitute silicone.
- For a blocked skimmer line, use a drain cleaning bladder and back flush from the pump side; avoid snakes and high pressure, which can damage aging PVC.
- Call a professional for settled decking, persistent water loss after repairs, or wet yard spots; line clearing or camera inspections cost $150 to $300.
Table of Contents
- Quick checklist: 30 to 60 second checks that solve most skimmer problems
- How to test and locate a skimmer leak
- Step-by-step DIY repairs by cause
- Costs, timelines, and when to hire a professional
- Why a specialist matters for structural leak repair
- A safety-first take on skimmer repairs
- Get a professional leak inspection from We Fix Ugly Pools
- FAQ
- Sources
Quick checklist: 30 to 60 second checks that solve most skimmer problems
Before assuming you have a structural problem, run through a short list of checks that catch the majority of skimmer issues. These take less time than brewing coffee and require no tools beyond your hands and a garden hose.
- Fill the pool so the water sits at the middle of the skimmer mouth, since water that’s too low starves the skimmer and mimics a leak.
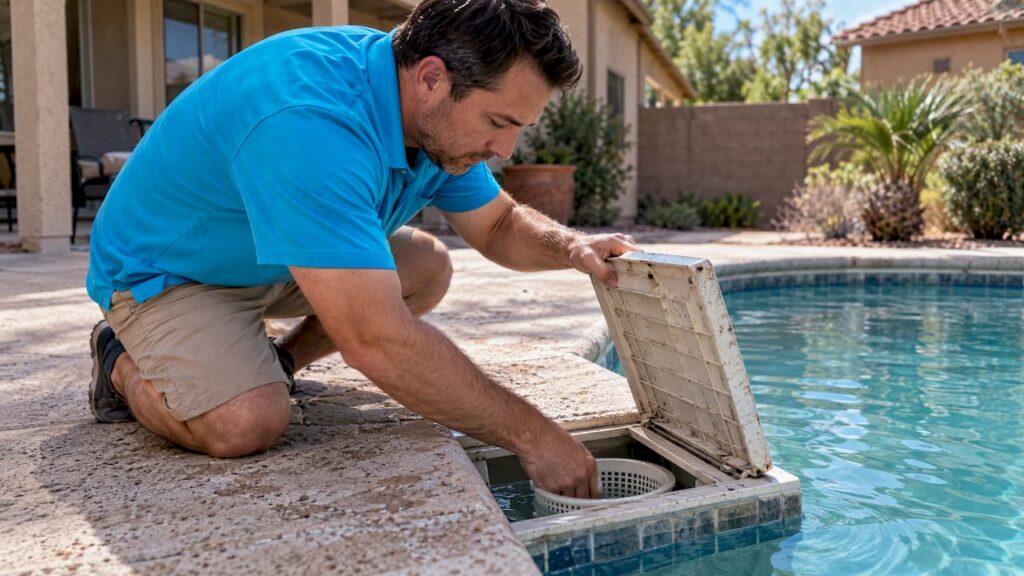
- Pull the basket, dump the debris, and check it for cracks or a warped rim that stops it from seating properly.
- Open the skimmer lid and make sure the weir door swings freely; a leaf or a twig jammed behind it can hold it open and throw off flow.
- Watch the return jets for a steady stream of air bubbles, which usually points to a suction-side air leak rather than water escaping the pool.
- Check the breaker and the pump’s automatic fill function, since a tripped breaker or a stuck fill valve can look exactly like a leak from across the yard.
Most skimmer flow complaints trace back to one of these five items, and the troubleshooting checklist from PoolCareHelp notes that water level, basket condition, and a stuck weir account for the bulk of service calls.
Pro Tip: Keep a spare basket on hand. A cracked or warped basket is cheap to replace and eliminates one variable fast, so you’re not chasing a phantom leak.
How to test and locate a skimmer leak
Once the quick checks don’t explain the water loss, it’s time to confirm whether you actually have a leak and narrow down where it lives. A few simple tests, done in order, will tell you most of what you need to know before you pick up a tool.
- Run the evaporation bucket test: place a bucket on the pool step so it floats partway in the water, mark the water line inside and outside the bucket, then check both lines after 24 hours. If the pool line drops more than the bucket line, you likely have a leak rather than ordinary evaporation, a method the EPA’s pool water efficiency guide recommends as a standard homeowner test.
- Shut off the automatic refill valve for that same 24-hour window. An autofill can quietly mask a leak by topping off the pool before you ever notice the drop, so the EPA advises disabling it periodically to see your true water loss.
- Add a few drops of leak-detection dye near the skimmer throat and watch where it streams. Dye that pulls toward the faceplate or a liner seam points to a gasket or liner problem rather than the plumbing itself.
- Walk the yard around the skimmer area and look for soggy soil, sunken decking, or a patch of grass that’s greener than the rest, all signs of water escaping underground near the fitting.
A loss greater than 2 inches per week (or 3 inches in hot, dry climates) usually signals a leak rather than normal evaporation, which gives you a concrete benchmark instead of guessing.
If the bucket test shows a real leak but dye and visual checks don’t pinpoint it, that’s the moment to bring in a professional for a pressure test or camera inspection of the plumbing. Underground lines and liner seams hidden behind the skimmer body aren’t diagnosable with a flashlight alone, and guessing at this stage tends to waste both time and money.
Step-by-step DIY repairs by cause
Once you know what you’re dealing with, most skimmer problems fall into one of six repair categories, ranging from a five-minute fix to a job that’s better left to a professional.
Water level and basket reseat. Top off the pool with a garden hose until the water sits mid-skimmer, then reseat the basket so its lip locks under the lid. This costs nothing beyond water, or up to $30 if you’re replacing a cracked basket, and takes under ten minutes.
Weir door cleaning and hinge lubrication. Pull the weir door out, scrub off mineral buildup, and apply a dab of silicone-based lubricant to the hinge pin so it swings freely again. Replacement doors typically run $5 to $15, and a sticky weir is one of the most overlooked causes of weak skimmer flow.
Faceplate and gasket reseat. Remove the faceplate screws in an alternating pattern (top, bottom, left, right) rather than working around the circle, since uneven pressure is a common cause of a warped seal. Hayward’s installation notes describe the gasket as a sandwich between the skimmer plate, the liner, and the pool wall, and specifically caution against substituting silicone for a proper gasket, since silicone can trap moisture behind the plate and accelerate rot in a vinyl liner.
- Hand-tighten screws rather than using a power driver, because over-torquing plastic housings is a frequent cause of hairline cracks.
- Replace the full gasket set rather than just the one that looks worn, since the others are usually close behind.
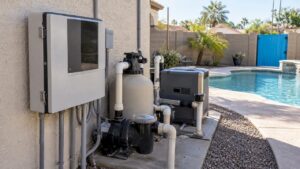
Pump lid O-ring and union checks. A dried-out O-ring on the pump lid or a loose union fitting pulls air into the suction line and shows up as bubbles at the returns. Pull the lid, inspect the O-ring for flat spots or cracking, and apply a thin coat of O-ring lubricant before reseating it; a new O-ring runs just a few dollars.
Clearing a blocked skimmer line. A drain-cleaning bladder inserted into the skimmer port, combined with back-flushing water from the pump side, clears most clogs without damaging the pipe. Swim University’s guide to unclogging a skimmer warns against forcing a plumber’s snake or blasting high-pressure water into the line, since aggressive methods can push debris deeper or crack aging PVC fittings instead of clearing them.
Cracked skimmer body. Hairline cracks around the skimmer throat or along the bottom seam usually show up as a slow, steady leak that no amount of gasket work will stop. A temporary patch with pool-rated epoxy can buy a few weeks, but a genuinely cracked body means excavating around the skimmer housing to cut it free and replace it, a job that involves cutting into decking or plaster and resealing the plumbing connections.

Pro Tip: Photograph every gasket and screw before you remove it. If a professional needs to finish the job later, those photos save them (and you) a return trip just to see the original setup.
Costs, timelines, and when to hire a professional
Most DIY fixes cost under $30 and take less than an afternoon, but the price climbs fast once the problem moves past the basket, weir, or gasket.
- Minor fixes (basket, weir, O-ring, gasket) typically run $5 to $30 in parts and are a weekend job for most homeowners.
- Line clearing or camera inspection performed by a professional generally falls between $150 and $300, according to PoolCareHelp’s service cost data, depending on how far the blockage sits from the skimmer.
- Skimmer body replacement involving excavation costs considerably more, since it requires cutting decking or plaster, replacing the housing, and reconnecting plumbing before resealing the area.
A professional visit usually starts with the same evaporation and dye tests you’d run yourself, followed by a pressure test on the plumbing and, if needed, a camera run through the line to spot cracks or separated joints invisible from the surface.
Call a pro right away if you notice deck settlement near the skimmer, water loss that stays above 2 inches per week even after your own repairs, or wet spots in the yard that don’t dry out between fillings. Before committing to a repair, get more than one bid, ask to see photos of the internal plumbing, and confirm whether the work carries a written warranty and the right local permits for any excavation.
Why a specialist matters for structural leak repair
A basket swap or gasket reseat is well within reach for most homeowners, but a cracked skimmer body or a leak buried in underground plumbing calls for a different level of diagnosis. Professional leak isolation combines pressure testing and camera inspection with controlled excavation, so the repair targets the actual crack or separated fitting instead of guessing at it from the surface.
We’ve spent over a decade transforming pools throughout the Phoenix area, and our leak inspection and repair work covers everything from a straightforward skimmer swap to full structural restoration. When a skimmer problem turns out to be tied to a failing shell or outdated plumbing layout, a broader remodel often solves more than a single-point repair ever could.
A safety-first take on skimmer repairs
Start with the fixes that are easy to undo: topping off water, cleaning a basket, freeing a weir door. Save force for nothing, since a plumber’s snake or a power driver can turn a $10 fix into a cracked housing. Keep photos and notes of every test and repair you run; they’re useful if you sell the home or need warranty coverage later. A quarterly habit worth keeping: shut off the autofill for 24 hours every few months just to see what the pool is really doing.
— Brian
Get a professional leak inspection from We Fix Ugly Pools
A skimmer that keeps leaking after your own repairs usually means the problem has moved past what a gasket or a basket can fix, and that’s exactly where our team spends most of its time. We’ve completed hundreds of pool transformations across the Phoenix area, and our pool repair services cover leak detection, skimmer replacement, pool plumbing repair, and full structural restorations when a shell or plumbing issue runs deeper than the skimmer itself.

Before your visit, it helps to clear the area around the skimmer, write down what you’re seeing (how much water loss, how often, when it started), and note which fixes you’ve already tried. That short list lets our technicians skip straight to the diagnostic steps that matter.
- Leak detection and repair for skimmers, plumbing, and shells
- Skimmer replacement, including excavation when the body is cracked
- Pool plumbing repair for suction-side air leaks and blocked lines
- Structural restorations when remodeling solves more than a single repair
Ready to find out what’s really causing your water loss? Request a pool repair inspection and we’ll walk you through what we find and what it takes to fix it.
FAQ
How to fix a leak around a skimmer?
Start by reseating the basket, checking the weir door, and tightening faceplate screws in an alternating pattern to even out the gasket seal. If dye testing shows the leak is coming from behind the faceplate rather than the gasket itself, the fix usually involves excavation and professional repair.
What is the cost to replace a pool skimmer?
Minor skimmer repairs like a basket, weir door, or gasket typically cost $5 to $30 in parts, while professional line clearing or camera inspection runs $150 to $300. A full skimmer body replacement that requires excavation costs more, since it involves cutting into decking or plaster and resealing the plumbing.
Why is my pool losing 2 inches of water a day?
Losing 2 inches of water in a single day points to a significant leak rather than evaporation, since the EPA’s threshold for investigating leaks is 2 inches per week, not per day. Run a bucket test with the autofill shut off for 24 hours to confirm the loss, then check the skimmer, pump area, and visible plumbing for obvious cracks or wet spots.
How to change skimmer on inground pool?
Replacing an inground skimmer involves cutting away the surrounding deck or plaster, removing the old housing, connecting the new skimmer body to the existing plumbing, and resealing the area with proper gaskets and finish material. This is a structural job best handled by a professional, since Hayward’s installation guidance calls for precise gasket sequencing and bonding kit installation that’s easy to get wrong on a first attempt.
Sources
- Jump Into Pool Water Efficiency (EPA guide)
- Pool Skimmer Not Working: Causes and Fixes
- How to unclog a pool skimmer (Swim University)
- Dyna-Skim wide mouth skimmer (Hayward product page)