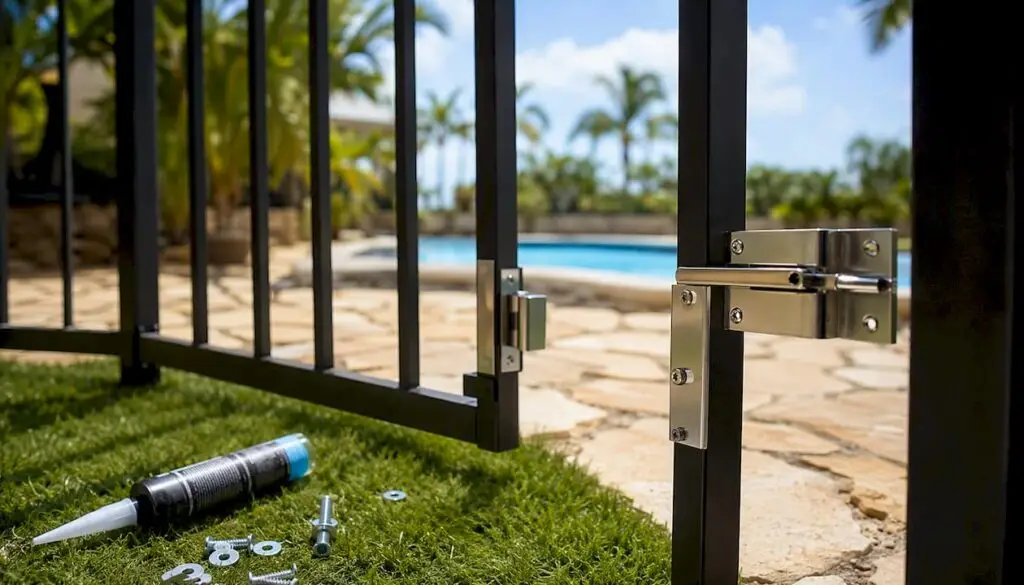
A safe, childproof pool gate must be self-closing, self-latching, open away from the pool, and have its latch release at least 54 inches above the ground [CPSC Safety Barrier Guidelines]. Those four requirements, drawn from CPSC Safety Barrier Guidelines, are the non-negotiable foundation of every pool gate installation. Get them right, and you’ve built a barrier that buys critical time. Miss any one of them, and the gate is decoration.
Here’s your quick-start checklist before you pick up a drill:
- Verify fence height: minimum 48 inches, with a higher preferred height recommended by most safety professionals
- Plan gate swing direction (away from the pool, always)
- Choose a code-friendly top-pull or compliant latch with release at or above 54 inches
- Set posts in concrete with proper depth and plumb
- Install self-closing hinges rated for outdoor/pool environments
- Test the gate’s self-close and self-latch action repeatedly before calling it done
One thing worth stating plainly: drowning is a leading cause of unintentional death for children ages 1–4, and a gate is one layer of protection, not a substitute for active adult supervision. The CPSC frames barriers as layers, not guarantees. Keep that perspective throughout this guide.
Table of Contents
- What tools and materials do you need before you start?
- How do you install a pool gate step by step?
- Which latch and hinges actually keep toddlers out?
- How do you test the gate and keep it childproof long-term?
- What codes and permits apply to your pool gate?
- What does a pool gate installation actually cost?
- When should you hire a professional instead of doing it yourself?
- Key Takeaways
- Why professional-grade details matter more than most guides admit
- Wefixuglypools can install and inspect your pool gate
- Useful sources for further reading and verification
What tools and materials do you need before you start?
Getting your kit together before you touch the yard saves a half-day of back-and-forth trips. Here’s what a complete, code-ready install actually requires.
Tools
- Post hole auger or manual digger (power auger for clay or caliche soil)
- Cordless drill with masonry and wood bits
- Torque-rated socket set
- 4-foot level (longer is better for post plumb checks)
- Tape measure and marking chalk
- Concrete mixing bucket or wheelbarrow
- Carpentry shims
- Safety glasses and work gloves
Materials and hardware
- Pressure-treated or galvanized steel posts sized for your gate width and soil type
- Stainless steel or hot-dip galvanized hardware throughout (screws, bolts, washers, hinges)
- Fast-setting concrete (Quikrete or equivalent) for post footings
- A weatherproof, non-climbable gate panel (aluminum, steel, or vinyl with pickets spaced no more than four inches apart)
- Self-closing hinges rated for outdoor and pool-chemical exposure
- A code-ready self-latching mechanism: top-pull latches such as the MagnaLatch Top Pull (MLTPS2BGA) are commonly specified in manufacturer instructions for pool code compliance
Near chlorinated water, hardware selection matters more than most homeowners expect. Cheap zinc-plated fasteners corrode within a season or two, causing latches to seize or hinges to bind. Stainless steel (grade 304 or 316) holds up to pool chemistry and Arizona-level UV without the failure modes that send you back to the hardware store mid-summer.
Pro Tip: Pack your kit with a handful of spare stainless washers, a few extra fasteners in the same size as your gate hardware, and a small tube of exterior-rated sealant. Nearly every install hits a moment where one small part is missing, and having spares on-site keeps the job moving.
How do you install a pool gate step by step?
Follow this sequence for a standard single-leaf pool gate. Each step includes the tolerance or check that prevents the most common failure modes.
-
Pre-check local rules and measure twice. Confirm gate width, swing direction (away from the pool), and any slope or retaining-wall complications before ordering materials. A gate that swings toward the pool fails code regardless of how well it’s built. Check your local building department for permit requirements before you dig a single hole. See the codes section below for specifics.
-
Mark the gate location precisely. Locate post centers and confirm clearance for the latch mechanism and full gate swing. Mark with chalk or stakes. Double-check that the swing arc clears any coping, decking, or landscaping.
-
Set the posts. Dig holes to a depth appropriate for stable installation, typically about one-third the post height for a fence of this size. Width should accommodate a concrete collar at least 6 inches in diameter around the post. Pour fast-setting concrete, check plumb on two axes, and brace the posts while the concrete cures. Allow at least 24–48 hours before hanging the gate. Rushing this step is the single most common cause of sagging gates.
-
Choose your anchoring method. For new installs in soil, poured concrete footings are the standard. For retrofit installs on existing concrete decking or stone surrounds, core-drilled sleeves with epoxy-set anchors are often the best technical solution. They avoid extensive demolition while providing strong, code-capable anchoring when sized and installed correctly. Use a hammer drill with a diamond-tipped core bit and follow the epoxy manufacturer’s cure time before loading the post.
-
Dry-assemble the gate frame before final fastening. Insert pickets, confirm the gate is square (measure both diagonals), and verify the frame fits the opening with appropriate clearance on all sides. Manufacturer instructions, including those for Yard & Pool gate systems, consistently recommend this dry-run step to catch fit issues before hardware is torqued down.
-
Hang the gate using corrosion-resistant hinges. Shim for level and clearance, leaving a small expansion gap (typically 1/8 to 3/16 inch) on each side to account for heat expansion, especially important in Phoenix-area climates where summer temperatures push aluminum and steel noticeably. Set spring tension so the gate closes fully from any open position without slamming.
-
Mount and align the latch mechanism. The release must be at or above 54 inches from the ground, or if mounted lower, at least 3 inches below the top of the gate on the pool side with openings near the release limited to ½ inch within 18 inches. Tighten all hardware to spec and test the latch from both sides.
-
Test repeatedly. Open and release the gate at least 20 times. Push and pull against the latch to confirm it won’t open under reasonable force. Run the tests at the hottest part of the day to catch any heat-related binding.
Visual learners: Watch the
before you drill. A 3–6 minute video of an actual install clarifies hinge placement and latch alignment faster than any written description. A
is also worth a few minutes of your time.
Common troubleshooting: If the gate sags after hanging, check post plumb first. A post that’s even slightly out of plumb transfers stress to the hinges and causes the gate to drift open or bind. Re-shim the hinge plates or re-drill post plates to correct alignment. If the latch doesn’t catch consistently, check that the strike plate and latch body are on the same horizontal plane. A 1/8-inch vertical misalignment is enough to cause intermittent failures.
Which latch and hinges actually keep toddlers out?
Hardware selection is where a lot of DIY installs fall short. The gate frame can be perfect, but if the latch is the wrong type or mounted at the wrong height, a determined three-year-old can figure it out.
Why top-pull latches are the preferred choice
Top-pull latches require a child to reach up and over the top of the gate to operate the release, a motion that demands both height and fine motor coordination beyond what most toddlers possess. The MagnaLatch Top Pull (model MLTPS2BGA) is one of the most commonly specified options in manufacturer and retailer installation instructions for pool code compliance. It uses a magnetic catch that requires deliberate upward pull to release, and it self-latches on gate close without any manual action from the user.
Latch placement rules you must follow
Per CPSC guidelines, the latch release must be either:
- At least 54 inches above the ground, or
- If mounted lower: at least 3 inches below the top of the gate on the pool side, with all openings within 18 inches of the release limited to ½ inch or less
The 54-inch rule is simpler to verify and inspect. When in doubt, mount higher.
Hinge selection and self-closing tension
Spring-loaded or hydraulic self-closing hinges (TruClose is a widely used brand in pool gate applications) must close the gate fully from any open position, including a 90-degree open position. Set the closing speed so the gate moves firmly but doesn’t slam. A gate that slams can bounce back open, defeating the self-latching function. Test closing speed after the gate has been in the sun for an hour, since heat changes spring tension slightly.

Pro Tip: Test the latch operation from both the pool side and the street side before finalizing. A latch that works perfectly from one side but binds from the other is a common install error that’s easy to catch and easy to fix before you pack up your tools.
Hardware specs to verify before buying
- Corrosion rating: stainless steel or marine-grade aluminum for pool environments
- Self-closing rating: confirmed for the gate’s weight and width
- Adjustable tension: spring or hydraulic hinges with field-adjustable closing speed
- Manufacturer code references: look for ASTM F2200 compliance or equivalent pool-barrier standard
- Warranty: at least one year on hardware; longer on magnetic latch mechanisms
How do you test the gate and keep it childproof long-term?
Installation is only the beginning. A gate that passes its first test can fail six months later if maintenance is skipped.
Initial testing checklist
Run every one of these checks before you consider the install complete:
- Open and release the gate 20 times from a fully open position. Confirm it self-closes and self-latches every single time.
- Push firmly against the latch from the pool side. It should not open under reasonable lateral force.
- Pull the gate toward you from the pool side. Confirm the latch holds.
- Reach test: have an adult attempt to operate the latch release from the pool side at toddler height (below 48 inches). The release should be unreachable or require a motion a toddler cannot replicate.
- Check for gaps: no opening in the fence or gate should exceed four inches. Measure with a 4-inch sphere or a tape measure at the widest point.
- Test at the hottest part of the day to catch heat-related binding or expansion gaps that affect latch alignment.
Ongoing maintenance schedule
- Weekly: — Walk the perimeter and remove any objects that could serve as a step or handhold. Planters, pool toys, chairs, and even a stacked pile of towels can create a climb path that negates your fence height. HealthyChildren.org specifically flags this as a high-risk oversight for families with young children.
When spring tension fails to the point where the gate no longer closes from a 90-degree open position, replace the hinges rather than attempting to re-tension worn springs. The same applies to a latch with internal corrosion: replace it, don’t lubricate around the problem.
What codes and permits apply to your pool gate?
The CPSC guidelines set a national baseline, but your local municipality or county almost always has additional requirements. Calling your building or pool inspector before you buy materials is the single most time-efficient step in this process.
CPSC baseline requirements
The CPSC Safety Barrier Guidelines for Residential Pools specify:
- Minimum fence height: 48 inches; 5 feet or higher is recommended
- Gates must be self-closing and self-latching
- Latch release at least 54 inches from the ground, or if lower, at least 3 inches below the top of the gate on the pool side with openings near the release ≤½ inch within 18 inches
- No openings in the fence that allow passage of a 4-inch sphere
- Non-climbable design: no horizontal rails or footholds on the pool side within the lower 45 inches
Local variation: what your municipality may add
Many cities and counties require stricter fence heights (often 5 or 6 feet), specific latch hardware from an approved list, pool alarms when the house wall serves as part of the barrier, and mandatory inspections before the pool can be used. Arizona, for example, has state-level pool barrier laws under the Private Pool Safety Act that go beyond the CPSC baseline. Check with your local building department for:
- Whether a permit is required (typically yes for new fence posts or structural changes; sometimes no for a simple hardware swap on an existing gate)
- Inspection windows and how to schedule them
- Accepted hardware lists or any banned latch types
- Documentation you need on-site during inspection (hardware spec sheets, manufacturer compliance references)
For a deeper look at the permit process, the pool permit design guide walks through what homeowners typically need to prepare.
Inspector checklist to prepare before your inspection:
- Barrier height measured at the lowest point
- Gate swing direction confirmed (away from pool)
- Latch height measured from ground to release mechanism
- All gaps measured (≤4 inches throughout)
- Non-climbable condition verified on pool side
- Any required pool alarms installed and tested
- Hardware spec sheets and manufacturer compliance documentation on-site
What does a pool gate installation actually cost?
Cost varies significantly based on gate material, post anchoring method, hardware quality, and whether you hire a professional. Here’s a practical breakdown.
Estimated ranges
DIY hardware and materials for a single gate with code-compliant latch and hinges generally run $150–$400 depending on gate size and hardware brand. A professional install, including materials, labor, and post setting, typically ranges from $500–$1,500 for a standard single gate, with higher costs for masonry anchoring, custom gate sizes, or permit-required documentation. These are general ranges; get local quotes for your specific site.
Timeline
- Prep and measurement: 1 day
- Post setting and concrete cure: 24–48 hours (do not hang the gate before concrete reaches working strength)
- Gate hanging and hardware installation: half to one day
- Final testing and adjustments: half day
A professional crew with two or more members can compress the hanging and hardware phases significantly, though concrete cure time is fixed regardless of who’s on-site.
Insurance and resale note: A documented, code-compliant install can support conversations with your homeowner’s insurance carrier and adds verifiable safety value at resale. Keep all invoices, hardware spec sheets, and permit documentation in a file with your home records.
When should you hire a professional instead of doing it yourself?
DIY is a reasonable choice for a straightforward install on flat ground with standard soil. Several situations shift the math toward hiring a pro.
When professional installation makes sense
- Complex gate geometry: L-shaped pools, pools with custom features like grottos, or sites where the house wall serves as part of the barrier involve code nuances that benefit from professional interpretation.
- Permit-required installs: When your municipality requires an inspection, a professionally installed gate with documentation is easier to pass. Professional pool repair and installation experience means the contractor already knows what inspectors look for.
What a professional should provide
A qualified contractor should deliver:
- A site measure and code confirmation before any work begins
- Written hardware specs, including latch model and hinge type
- Post-setting documentation (depth, concrete type, cure time)
- A parts and warranty list
- An on-site final test with repeated self-closing and self-latching demonstration
Contractor vetting checklist
When interviewing installers, ask:
- Have you pulled permits for pool barrier installs in this municipality?
- Can you provide proof of general liability insurance?
- What latch hardware do you plan to install, and what is its code reference?
- Can you show photos of completed pool barrier installs?
- What is your warranty on labor and hardware?
Red flags to watch for: A contractor who gives vague answers about permits, cannot name the specific latch model they plan to install, or declines to do a final on-site demonstration of repeated self-closing and self-latching is not the right hire for a safety-critical install. The pool safety fence installation guide covers additional questions worth asking before signing a contract.
Key Takeaways
A childproof pool gate must be self-closing, self-latching, open away from the pool, and have its latch release at or above 54 inches from the ground to meet CPSC baseline requirements and provide meaningful protection for young children.
| Point | Details |
|---|---|
| Latch height is non-negotiable | Place the release at ≥54 inches from the ground, or follow the CPSC’s alternative placement rules precisely. |
| Set posts before anything else | Concrete footings need 24–48 hours to cure; rushing this step causes sagging gates and latch failures. |
| Use stainless hardware throughout | Plated fasteners corrode near pool chemicals and cause latch seizure; grade 304 or 316 stainless holds up. |
| Test 20+ times before calling it done | Self-close and self-latch cycles at the hottest part of the day catch heat-related binding before a child does. |
| Wefixuglypools handles complex installs | For sloped terrain, masonry decks, or permit-required documentation, Wefixuglypools provides site measurement, code-compliant hardware, and post-install testing in the Greater Phoenix area. |
Why professional-grade details matter more than most guides admit
Most installation guides treat a pool gate like a standard fence project with a fancier latch. In practice, the failure modes are different and the stakes are higher.
The field problems we see most often at Wefixuglypools aren’t dramatic structural failures. They’re quiet, incremental ones: a post set 18 inches deep instead of 24, a latch mounted at 48 inches instead of 54, a set of zinc-plated screws that looked fine at install but seized solid by the following summer. None of those issues are obvious to a homeowner doing a visual check. All of them compromise the gate’s function in ways that matter when a two-year-old is curious and fast.
The climbable-object problem is the one that surprises people most. A perfectly installed, code-compliant fence can be defeated in thirty seconds by a patio chair left within arm’s reach of the barrier. We’ve seen it on job sites and on re-inspection visits. The fence didn’t fail. The perimeter management did.
What professional installation actually buys you, beyond the hardware and the labor, is documentation. An inspection-ready install with spec sheets, permit records, and a signed completion checklist is a different asset than a DIY install with no paper trail. That documentation matters to your insurance carrier, to a future buyer, and to a building inspector who needs to sign off on your barrier.
The technical details in this guide are accurate and sufficient for a straightforward DIY install. For anything involving masonry, slope, or permit compliance, the cost of getting it wrong outweighs the cost of hiring someone who does this regularly.

Wefixuglypools can install and inspect your pool gate
If you’d rather have a code-compliant gate installed correctly the first time, Wefixuglypools serves homeowners across the Greater Phoenix area with site measurement, permit-handling guidance, and professional installation using hardware that meets CPSC and local code requirements, including MagnaLatch-style top-pull latches and corrosion-rated stainless hardware. Every install includes a post-install test with documented self-closing and self-latching verification.

Our scope for gate and barrier work includes:
- On-site measurement and code confirmation
- Permit application guidance and documentation support
- Code-compliant hardware installation (top-pull latches, self-closing hinges, stainless fasteners)
- Post setting in concrete footings or core-drilled epoxy anchors for existing decking
- Final self-close and self-latch testing with written documentation
Ready to get a quote or schedule an inspection? Visit our pool remodeling and safety services page or reach out directly to schedule a site visit. If you’re in the Surprise or North Scottsdale area, our local service team is ready to help.
Useful sources for further reading and verification
These references support the specifications and steps in this guide. Each one is worth bookmarking before you start your install or meet with a contractor.
- Safety Barrier Guidelines for Residential Pools
- Pool Dangers and Drowning Prevention―When It’s Not Swimming Time – HealthyChildren.org
- Yard&PoolVG_Instructions-Cover-F copy
- Step-by-Step Guide to Installing a Pool Gate – Pool Barrier of Arizona
- Child-Proof Pool Latches: What You Should Know
-
-
- How to Install a Pool Safety Fence for Families