Pool restoration before and after examples are visual and descriptive records of how deteriorating pools transform into clean, safe, and beautiful backyard retreats through professional remodeling. The industry term for this work is pool remodeling or pool renovation, and the before and after photos that document it are the clearest way for homeowners to visualize what is possible. Typical upgrades include surface finishes, waterline tile, coping, water features, and equipment. Costs range from $5,000 for basic resurfacing to well over $75,000 for full pool overhauls. Understanding what these transformations actually involve helps you plan smarter and spend more confidently.
1. What are the most impactful elements in pool restoration before and after examples?
The biggest visual shifts in any pool renovation before and after come from four core upgrades: surface finish, tile, coping, and water features. Each one changes how the pool looks and how long it lasts.
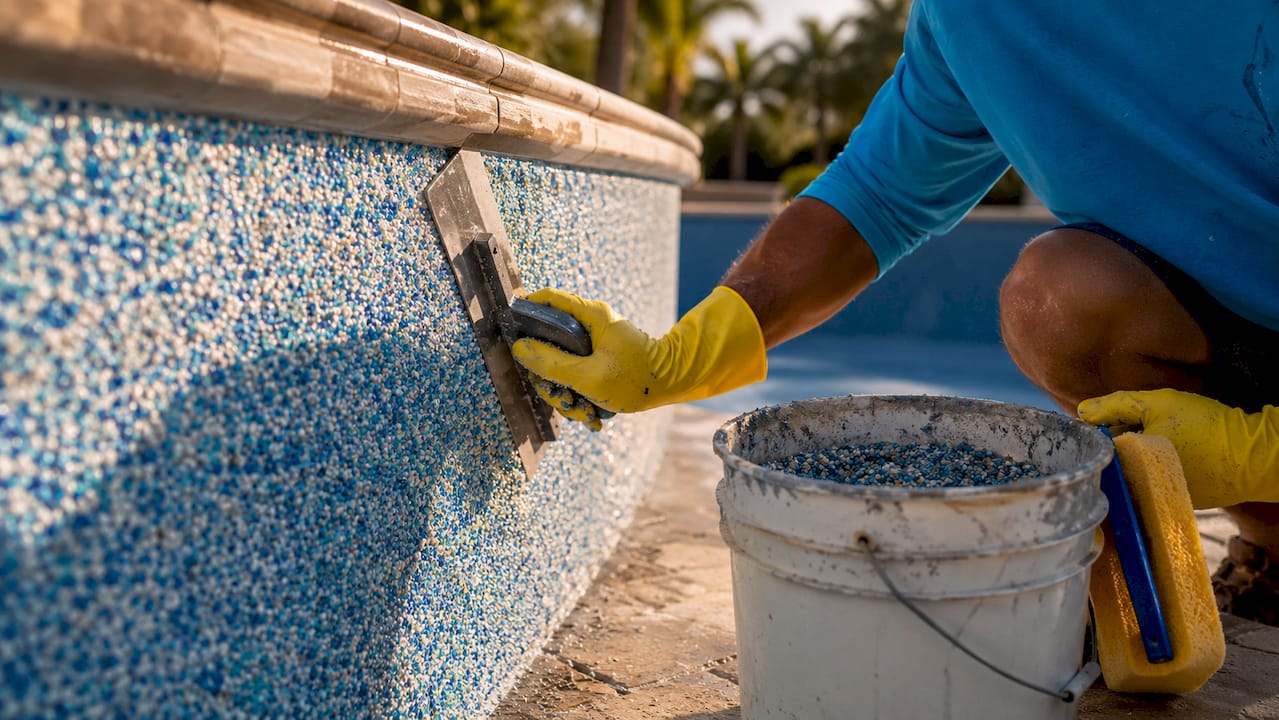
Surface finishes are the most dramatic upgrade in before and after pool photos. Old white plaster turns gray, stains easily, and feels rough underfoot. Replacing it with a pebble aggregate or quartz finish produces a richer color, a smoother texture, and a surface that resists algae and chemical wear far better than standard plaster.
Tile and coping define the pool’s visual frame. Waterline tile protects the bond beam from chemical and water damage while adding color and pattern. The bond beam and coping installation requires precision leveling and proper slope to manage splash water. When coping stones are replaced with travertine, bullnose pavers, or cantilevered concrete, the entire perimeter looks finished and intentional.
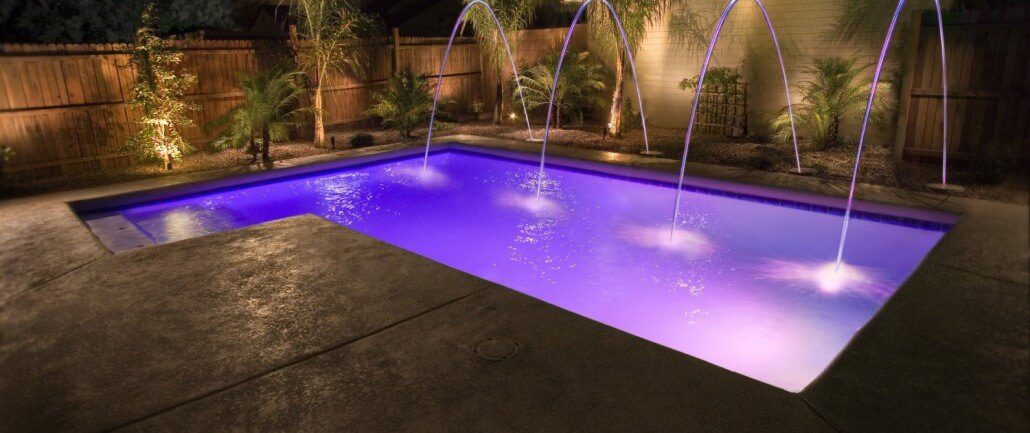
Water features are where modern pool makeover examples show the sharpest contrast. Outdated lion head spouts give way to sleek scupper spillways and sheet waterfalls that look current and sound far better. Replacing a single dated feature can shift the entire mood of a backyard.
- Plaster resurfacing: most affordable, best for structurally sound shells
- Quartz finish: mid range cost, excellent stain resistance, rich color options
- Pebble aggregate: premium look and feel, longest lifespan of the three
- Waterline tile replacement: updates the visual border and protects the bond beam
- Coping replacement: travertine, pavers, or cantilevered concrete each offer distinct aesthetics
- Water feature swap: scuppers, sheer descents, and bubblers replace dated spouts
Pro Tip: When reviewing before and after pool photos, look at the waterline tile first. If the tile is unchanged, the renovation was likely surface only. Tile replacement signals a more thorough and durable job.
2. How does timing and process unfold in typical pool restoration projects?
A swimming pool transformation does not happen overnight. Most full inground pool renovations take 2.5 to 5 weeks from drain to swim ready, with total downtime around 3–6 weeks including curing and startup. Permitting and local weather windows can extend that timeline further. Knowing the phases prevents frustration and helps you plan around the downtime.
Here is how a typical pool renovation project unfolds from start to finish:
- Drain and inspect. The pool is fully drained, which often reveals cracks, delamination, and plumbing issues invisible when the pool is full. This phase sets the scope of the entire project.
- Demolition and prep. Old plaster or finish is chipped away using pneumatic tools. Proper surface preparation, including crack repair and full removal of old material, is the most commonly skipped step and the leading cause of premature finish failure.
- Plumbing and equipment upgrades. With the pool empty, this is the right time to replace old returns, add automation, or upgrade the pump and filter. Doing it now avoids tearing up new work later.
- Tile and coping installation. New waterline tile is set, then coping stones are installed and leveled. This phase typically takes 3–5 days depending on the perimeter size and material chosen.
- Surface application. New plaster, quartz, or pebble finish is applied by hand in a single continuous session to avoid seam lines. The crew works fast and the pool must not be touched until the surface sets.
- Fill and chemical startup. Starting pool chemistry with pH, calcium hardness, and alkalinity properly balanced is critical. Poor startup chemistry is the number one cause of premature finish damage after a renovation.
- Curing period. Plaster can be ready to use within about 24 hours of filling, but quartz and pebble finishes require 10–14 days of curing before the pool is swim ready. Rushing this step voids most warranties.
Pro Tip: Schedule your pool renovation to start in early spring or fall. Extreme heat in Phoenix accelerates plaster drying unevenly, which can cause surface cracking before the finish fully cures.
3. Comparison of pool makeover types featured in before and after transformations
Not every pool renovation before and after represents the same scope of work. Three distinct categories appear most often in before and after pool photos, and each delivers a different level of visual impact, durability, and cost.
| Makeover type | Best for | Typical cost range | Durability | Visual impact |
|---|---|---|---|---|
| Resurfacing only | Structurally sound pools with aged finish | $5,000–$15,000 | 10–15 years | High: color and texture change |
| Vinyl liner replacement | Vinyl pools with torn or faded liners | $4,000–$12,000 | 8–12 years | Moderate: pattern and color update |
| Full pool renovation | Pools needing layout, equipment, or hardscape work | $30,000–$75,000+ | 20–30 years | Transformational |
Resurfacing is the right call when the pool shell is structurally intact but the finish is stained, rough, or peeling. The process strips the old surface and applies a new plaster, quartz, or pebble coat. Typical pool remodel costs for resurfacing and tile and coping upgrades range from $5,000 to $30,000 depending on finish type and pool size.
Vinyl liner replacement is a separate category entirely. Liner replacement involves removing the failed liner, inspecting the floor and wall panels for damage, and installing a new printed vinyl liner. A Manotick pool restoration documented by HB Pools combined liner replacement with coping updates and a new concrete deck, showing how hardscape work amplifies the visual result.
Full renovation is the most dramatic category in pool restoration success stories. These projects rebuild from the shell outward, updating the surface, equipment, tile, coping, and often the layout. Full renovations produce results that look and perform like new builds and last 20–30 years. They also eliminate the cycle of repeated partial repairs that costs more over time.
- Resurfacing alone changes color and texture but does not address equipment or hardscape
- Liner replacement is specific to vinyl pools and does not apply to gunite or concrete shells
- Full renovation is the only option that addresses every visible and functional element at once
- Combining resurfacing with tile, coping, and water feature upgrades produces the most striking before and after pool photos
4. Examples of stunning pool restorations: visual descriptions of before and after pools
The most compelling pool renovation project examples share a common pattern. The “before” shows a pool that is functional but visually exhausted. The “after” shows a space that looks like it belongs in a resort.
Project 1: Scupper and tile overhaul. The before showed a dated pool with a gray plaster interior, cracked coping, and two ceramic lion head spouts mounted on the back wall. The after featured a bright white pebble finish, new travertine coping, updated waterline tile in a linear glass mosaic pattern, and two stainless steel scupper spillways. The same footprint looked like a completely different pool.
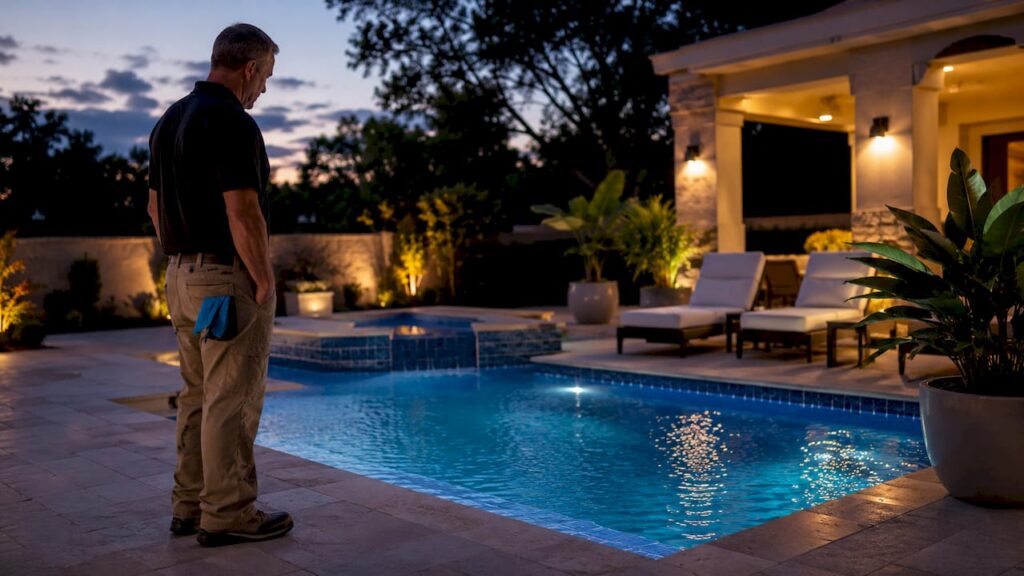
Project 2: Spa integration and deck expansion. A rectangular pool with no spa and a cracked concrete deck was transformed into a pool and spa combination with a raised bond beam, new coping, and a travertine deck that extended the usable patio area by 300 square feet. The pool and spa remodel added both function and resale value. LED color lighting installed in the spa wall created an entirely different nighttime experience.
Project 3: Vinyl liner and hardscape refresh. The before showed a vinyl pool with a faded blue liner, dated plastic coping, and a plain concrete surround. The after featured a new printed liner in a dark slate pattern, updated aluminum coping, and a freshly poured brushed concrete deck. The project also included new returns and a variable speed pump. The visual shift was significant even without touching the pool shell.
Project 4: Full gunite renovation with water features. A 1990s kidney shaped pool with original white plaster, broken tile, and a single fountain jet was fully renovated. The new version included a pebble aggregate finish in ocean blue, a sheer descent waterfall mounted on a raised wall, new LED lighting, and a complete equipment pad replacement. The custom water features alone changed how the backyard felt at every hour of the day.
These examples show that the most dramatic swimming pool transformations combine at least three upgrade categories: surface, hardscape, and features or equipment.
Key takeaways
Pool restoration delivers the most lasting results when surface prep, curing time, and equipment upgrades are treated as non-negotiable parts of the process, not optional add-ons.
| Point | Details |
|---|---|
| Surface finish drives visual impact | Upgrading from plaster to quartz or pebble produces the biggest color and texture shift in before and after photos. |
| Prep work determines durability | Skipping crack repair or proper old finish removal causes delamination and shortens the new surface’s lifespan. |
| Curing time cannot be rushed | Quartz and pebble finishes require 10–14 days of curing before use; rushing this step damages the finish permanently. |
| Full renovations outlast patch repairs | Comprehensive rebuilds that address surface, tile, coping, and equipment last 20–30 years and avoid repeated downtime. |
| Chemical startup protects your investment | Balancing pH, calcium hardness, and alkalinity immediately after resurfacing prevents premature finish failure. |
My take after seeing hundreds of pool transformations in Phoenix
The most common mistake I see homeowners make is treating pool restoration as a cosmetic project. They look at before and after pool photos and focus entirely on the color of the new finish. What they miss is everything underneath: the crack repairs, the equipment swap, the chemical startup protocol. Those invisible steps are what separate a renovation that looks great for 20 years from one that starts showing problems in 18 months.
I have also seen homeowners underestimate the value of doing everything at once. Pools that undergo full renovations with equipment upgrades avoid repeated downtime and maximize long-term value. When you drain a pool for resurfacing and skip the equipment upgrade because it “still works,” you are likely draining it again in two years to fix the pump. That costs more in total than doing it right the first time.
The other thing I want to be direct about: curing time is where homeowners most often let excitement override good judgment. Surface curing time is consistently underestimated by people who focus on the immediate visual result and ignore durability. I understand the feeling. You have waited weeks, the pool looks incredible, and you want to swim. But those 10–14 days for a pebble or quartz finish are not a suggestion. They are the difference between a surface that lasts a decade and one that needs attention in three years.
Finally, choose a contractor who documents their work. Before and after photos are not just marketing. They are evidence that the contractor takes pride in the process and stands behind the result. If a company cannot show you a library of real pool restoration success stories with clear before and after pool photos, that tells you something important.
— Brian
See what a real pool transformation looks like with Wefixuglypools
If your pool is stained, rough, or just plain outdated, you do not have to guess what a renovation could look like. Wefixuglypools has spent a decade transforming pools across the Greater Phoenix area, from basic resurfacing jobs to complete pool remodeling and restoration projects that include new tile, coping, water features, and equipment upgrades. We document every transformation so you can see exactly what is possible before you commit.
Whether you are in Scottsdale, Surprise, or anywhere in the Valley, our team will walk you through your options and build a plan that fits your goals and your budget. Contact Wefixuglypools today to schedule your consultation and get a personalized look at what your pool could become. Visit our pool remodeling services page to get started.
FAQ
What do pool restoration before and after examples typically show?
They show the visual difference between an aged or damaged pool and the finished result after resurfacing, tile replacement, coping updates, and feature upgrades. The most informative examples also document the process phases, not just the final result.
How long does a full pool restoration take from start to finish?
Most full inground pool renovations take 2.5 to 5 weeks from drain to swim ready, with total downtime around 3–6 weeks when curing and chemical startup are included.
What is the difference between resurfacing and a full pool renovation?
Resurfacing replaces only the interior finish of a structurally sound pool, while a full renovation addresses the surface, tile, coping, water features, equipment, and sometimes the layout. Full renovations produce results that last 20–30 years.
How much does a pool restoration cost?
Costs range from $5,000 to $30,000 for resurfacing and tile and coping upgrades, while full overhauls can exceed $75,000 depending on scope, materials, and added features like spas or water features.
Can I swim immediately after pool resurfacing?
Plaster surfaces can be ready within about 24 hours of filling, but quartz and pebble finishes require 10–14 days of curing before the pool is safe to use. Swimming too early damages the finish and can void the warranty.