
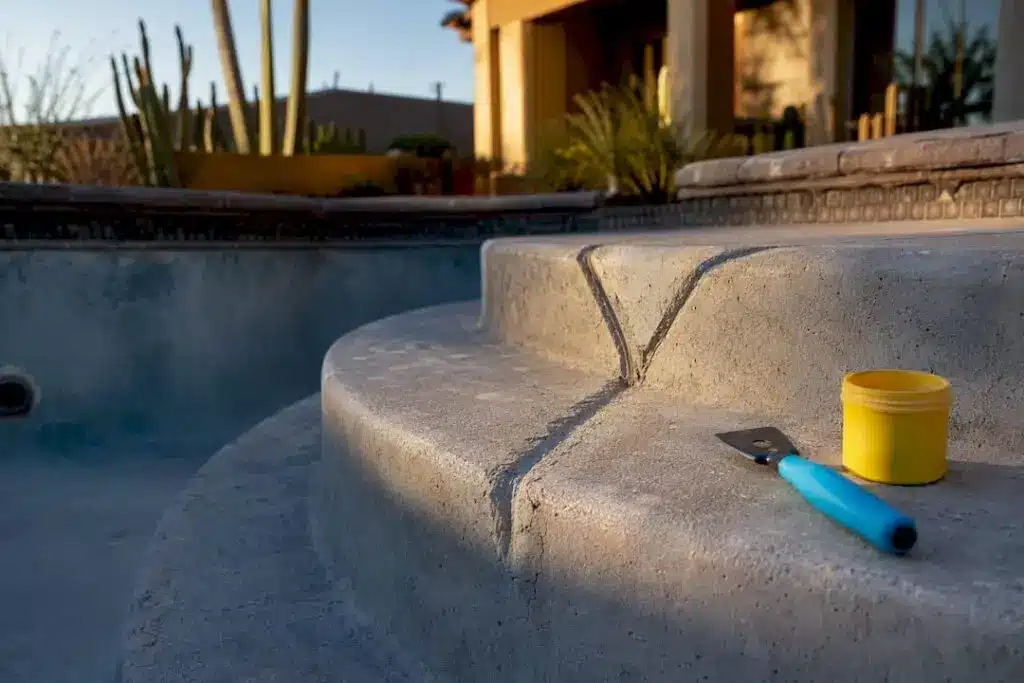
Yes, most cracked or leaking pool steps can be repaired. The right method depends entirely on what the step is made of and how deep the damage goes. Concrete needs epoxy or hydraulic cement. Fiberglass needs resin and mat. Thermoplastic needs flexible adhesive, not rigid patches. Hairline surface cracks are usually a weekend DIY job. Anything involving voiding, flexing, or ongoing water loss belongs to a professional.
TL;DR:
- Using the wrong repair method for your pool step material or attempting surface patches on undermined or flexing steps can lead to recurring failures within months.
- Concrete or gunite steps should be patched with epoxy or hydraulic cement, with cracks widened and sealed properly for durability.
- Fiberglass steps require sanding, layering with fiberglass mat and resin, then finishing with gelcoat, unlike rigid cement patches.
- Thermoplastic and acrylic steps need flexible adhesives or welding because rigid epoxy cannot handle temperature-induced flexing and movement.
- Persistent water loss, hollow or shifting areas, or cracks that keep recurring signal underlying structural failure, requiring professional stabilization rather than DIY fixes.
Table of Contents
- How Do You Diagnose Pool Step Damage Before Repairing It?
- Repair Methods by Step Material
- What Tools and Prep Do You Need Before Starting?
- Step-By-Step Pool Step Repair Workflow
- Finishing and Curing: How to Make the Repair Last
- When Should You Call a Professional for Step Repair?
- What Does Pool Step Repair Cost and How Long Does It Take?
- How Can You Prevent Future Pool Step Damage?
- Why We Prioritize Structural Fixes Over Cosmetic Patches
- How We Fix Ugly Pools Handles Step Repair
- Sources
How Do You Diagnose Pool Step Damage Before Repairing It?
Before you buy a single tube of epoxy, figure out what you’re actually working with. Step material changes everything about how you repair it, and guessing wrong wastes money and time.
Gunite and shotcrete steps feel rough and porous, often under a plaster or pebble finish that chips to reveal gray concrete underneath. Fiberglass steps have a smooth, glossy gelcoat surface and feel warmer to the touch. Thermoplastic or acrylic steps (common on above-ground and some vinyl-lined pools) feel slick and slightly flexible when you press on them. Vinyl-lined steps are typically a rigid step unit covered by the pool’s liner material, so damage often shows up as a liner tear rather than a cracked surface.
Once you know the material, assess severity:
- Run a fingernail across the crack. If it catches on a raised or displaced edge, treat it as structural, not cosmetic.
- Check for water loss beyond normal evaporation, at a level that suggests a crack penetrating the shell.
- Tap around the crack with a screwdriver handle. A hollow or dull sound suggests voiding beneath the step, where soil or backfill has washed away.
- Watch for flexing when you stand on the step. Any give at all is a sign the support structure has failed, not just the surface.
If you find voiding, flexing, or steady water loss, stop here. That combination signals undermining that no surface patch will fix, and it calls for professional stabilization before anything cosmetic happens.
Repair Methods by Step Material
Each material has one repair path that actually holds up, and a handful of shortcuts that fail within a season. Here’s the breakdown.

Concrete and gunite steps respond well to pool-grade epoxy or hydraulic cement, especially for cracks up to about half an inch wide. The standard approach involves widening the crack into a keyed, V-shaped profile so the patch has something to grip, then packing it with epoxy putty or hydraulic cement before finishing with a plaster skim coat to match the surrounding surface. This is the most forgiving material for a first-time DIY repair.
Fiberglass steps need a different playbook entirely. You’re working with resin, fiberglass mat, and gelcoat, not cement. Prep involves sanding back the gelcoat, cleaning the area thoroughly, and cutting a shallow V-groove along the crack so resin has somewhere to key in. Apply the fiberglass mat and resin in layers, let it cure, then sand and finish with gelcoat to blend the repair into the surrounding shell.
Thermoplastic and acrylic steps are the material most homeowners get wrong. Rigid epoxy looks like a reasonable fix, but it commonly fails on thermoplastic because the material flexes slightly with temperature and rigid patches can’t move with it. The correct approach uses flexible structural adhesives like methacrylate, or plastic welding for larger failures, paired with the stop-drill technique at each end of the crack to keep it from spreading further.
Vinyl-lined steps usually mean patching the liner itself rather than the step unit underneath. Small tears take a standard vinyl patch kit applied underwater or dry, depending on the product. Seam failures along the step’s edges are trickier and often mean the gasket or track needs resealing rather than a simple patch. If seams keep failing in the same spot, that’s usually a sign of liner age or a step frame that’s shifted, and replacement makes more sense than repeated patching.
Pro Tip: Some adhesives cure underwater, which is genuinely useful for a small hairline leak you don’t want to drain the whole pool to fix. But these products have tight prep and application windows, so read the instructions twice before you open the packaging.
What Tools and Prep Do You Need Before Starting?
Before mixing anything, get your safety and prep sequence right. Skipping this step is where most DIY repairs go sideways.
Turn off pool pumps and any electrical equipment near the work area, and wear gloves and eye protection when grinding or mixing epoxy. Check the product’s safety data sheet for ventilation requirements, especially with resin-based repairs, since fumes can build up fast in a below-grade pool basin.
- Lower the water level below the repair area for dry patch work, or confirm your product is rated for underwater application if you’d rather skip draining.
- Grind or chisel out loose material with a rotary tool or cold chisel until you reach solid substrate.
- Clean the area with a wire brush and shop vacuum, then wipe with isopropyl alcohol to remove residue that keeps patches from bonding.
- Stage your materials, whether that’s epoxy putty, hydraulic cement, a fiberglass repair kit, or methacrylate adhesive, so you’re not scrambling mid-mix.
- Rent a wet/dry vacuum or small angle grinder if you don’t own one; both typically run $30 to $60 for a weekend rental.
Most small kits, putties, and adhesives run $20 to $80 depending on brand and coverage area, which is worth knowing before you decide whether this is a DIY weekend or a job for a contractor.
Step-By-Step Pool Step Repair Workflow
The short version: profile the crack, clean it, patch it, let it cure, then test before you refill. Here’s how that breaks down in practice.
- Profile and key the damage. Widen the crack into a V-groove using a grinder or cold chisel, and stop-drill the ends of any crack in thermoplastic material to keep it from creeping further.
- Clean thoroughly. Remove all loose debris and dust with a wire brush and shop vacuum, then wipe the area with isopropyl alcohol so the patch bonds to clean substrate, not grime.
- Mix and apply the correct product. Follow the manufacturer’s mixing ratio exactly. Overfill the groove slightly, since most patch materials shrink a bit as they cure.
- Shape and level while workable. Use a putty knife or trowel to match the surrounding contour before the material sets up.
- Let it cure fully before refilling. Cure windows vary by product, often from a few hours for fast-set epoxy to 24 hours or more for fiberglass resin.
- Refill slowly and monitor. Add water gradually and check the repair daily for the first week.
A small daily water loss beyond normal evaporation after a repair is the clearest sign something deeper is still leaking, and it’s worth catching before you assume the job’s done.
Finishing and Curing: How to Make the Repair Last
A patch that holds isn’t the same as a patch that looks right. Getting the finish and cure sequence correct is what separates a repair you forget about from one you’re redoing next summer.
- Sand progressively through finer grits, moving from coarse to fine, rather than jumping straight to a fine grit that just polishes over an uneven patch.
- Feather the edges gradually so the repair blends into the surrounding surface instead of leaving a visible ridge.
- For color matching, a plaster skim coat works on concrete, gelcoat works on fiberglass, and epoxy pool paint works on both once the base repair is fully cured, never before.
- Respect the full cure window before adding water pressure or foot traffic. Rushing this step is the single most common reason repairs fail early.
- After refilling, check pH and alkalinity right away. New patches are more vulnerable to chemical etching in the first few weeks than the rest of the pool surface.
When Should You Call a Professional for Step Repair?
Some damage just isn’t a weekend project, no matter how good your epoxy is. If you’re seeing any of these signs, it’s time to bring in a pro rather than attempt another patch:
- Water loss continues after a repair that should have sealed it.
- The area underneath the step sounds hollow or feels soft when you press on it.
- The step visibly flexes or shifts under weight.
- You’ve patched the same crack more than once and it keeps coming back.
Professionals have tools homeowners typically don’t, starting with structural injection and foam or aggregate infill to rebuild support behind a step before sealing the surface. That distinction matters because a cosmetic patch over a voided step just relocates the problem a few inches away.
Structural repairs often involve injecting high-density closed-cell foam or aggregate behind the step to reestablish support before any surface sealing happens. Cosmetic patches can’t stop the flex that caused the crack in the first place, so the crack, or a new one nearby, comes back.
When you’re vetting a contractor, ask how they verify the repair afterward. A solid estimate should include a water-loss monitoring period or pressure test, not just a patch-and-go visit. Some professionals have spent a decade handling exactly this kind of structural work in similar regions, and the difference between a surface patch and a true structural fix usually shows up within the first year, one way or the other.
What Does Pool Step Repair Cost and How Long Does It Take?
Budget depends heavily on whether you’re patching or replacing. Here’s a realistic range:
- DIY material costs for small concrete or fiberglass patches typically run $20 to $80, plus another $30 to $60 if you need to rent a grinder or wet/dry vacuum.
- Professional stabilization or crack repair for voided or structurally compromised steps generally runs into the hundreds of dollars, depending on access and extent of the infill work needed.
- Full step replacement or resurfacing costs more but resolves recurring failures for good, especially when the underlying support has already failed once.
- Timelines range from a single afternoon for a simple DIY patch to several days for professional work, once you factor in cure time between stages.
Always get more than one quote for anything beyond a small patch, and ask directly whether the contractor is insured and what warranty covers the repair.
How Can You Prevent Future Pool Step Damage?
A little seasonal attention goes a long way toward keeping repairs from becoming a recurring line item.
- Inspect steps each spring and fall for new hairline cracks, especially near the top step where foot traffic concentrates.
- Keep pH and alkalinity balanced year-round to protect plaster, gelcoat, and epoxy finishes from premature etching.
- Watch for soil saturation or poor drainage near the pool’s exterior, since saturated backfill is a common cause of voiding behind steps.
- Reseal or refinish steps proactively once you notice surface roughness or fading, rather than waiting for a crack to force the issue.
Why We Prioritize Structural Fixes Over Cosmetic Patches
Most articles on this topic stop at “here’s how to patch a crack.” That’s fine advice for a hairline surface issue, but it skips the harder question: why did the crack form in the first place? In our experience, a huge share of “repeat” step repairs aren’t really repeat failures. They’re the same underlying voiding or support loss, patched cosmetically two or three times before anyone addresses what’s actually happening underneath.
That’s the gap DIY guides rarely mention. A patch that looks perfect for six months isn’t a successful repair if the support behind it never got fixed. Structural durability has to come before cosmetic finish, every time, or you’re just buying time.
— Brian
How We Fix Ugly Pools Handles Step Repair
Wefixuglypools gives Phoenix-area homeowners a straightforward alternative to guessing your way through a DIY fix on a step that might have deeper structural issues. Where a patch kit only addresses what you can see, our approach starts with figuring out what’s happening underneath the surface, including support loss, voiding, and the kind of flex that keeps bringing cracks back.

A typical site visit should include a full inspection of the step and surrounding shell, a clear explanation of whether the issue is a surface repair or a structural one, and a written estimate that spells out materials, timeline, and warranty coverage before any work begins. For steps too far gone for a patch, we also handle full replacement and resurfacing as part of broader pool repair and remodeling projects across the Phoenix area. If your steps have been patched more than once already, request an on-site estimate and get a straight answer on what’s really going on before you spend another weekend on a fix that won’t hold.
Sources
- How to Fix a Cracked Swimming Pool Step
- Repair Pool Step Cracks & Leaks
- How to Repair Cracks in Pool Steps
- How to Repair Thermoplastic Pool Steps The Permanent Fix


