
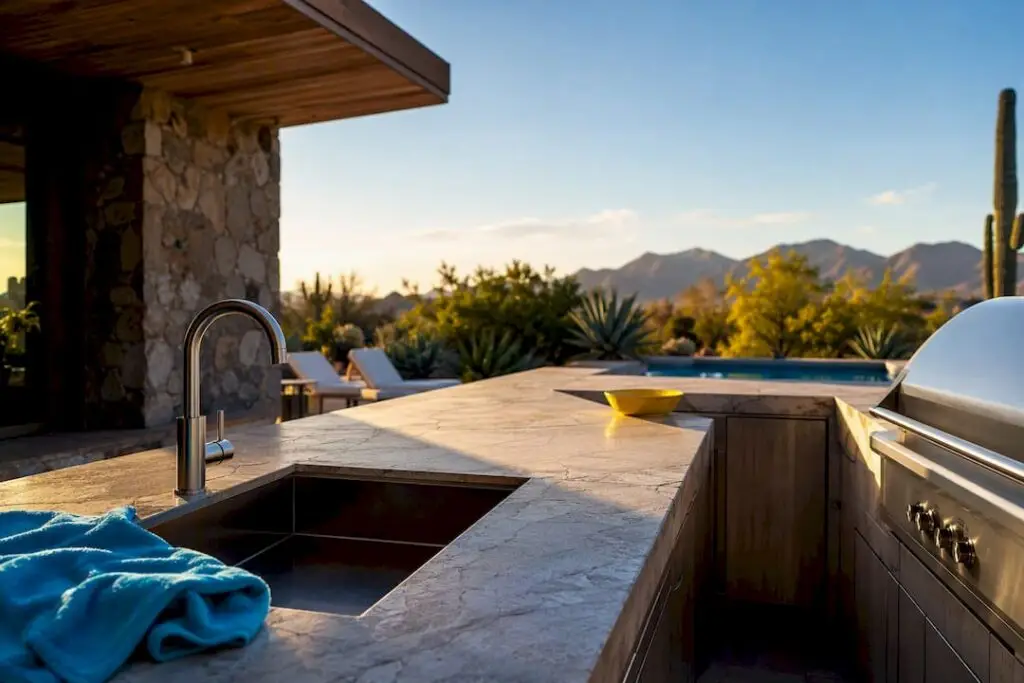
Yes, an outdoor kitchen by the pool is one of the smartest additions you can make to a backyard, provided you plan the layout before you plan the finishes. Three things are non-negotiable: a built-in grill, an outdoor-rated refrigerator, and a sink with real drainage and a GFCI-protected outlet. Measure your space, call your local building department, and talk to a contractor before you buy a single appliance.
TL;DR:
- Place the grill, sink, and refrigerator within four to nine feet of each other to optimize workflow without unnecessary walking or bumping elbows.
- Use outdoor-rated materials such as HDPE cabinets, sealed concrete or granite countertops, and appliances built specifically for outdoor use to withstand pool chemicals and sun exposure.
- Ensure proper safety clearances around the grill, with at least 36 inches of vertical space, and incorporate GFCI outlets and weatherproof fixtures to prevent electrical hazards.
- Budget for a range from about $5,000 for basic setups to over $50,000 for luxury kitchens with premium appliances and structures, plus permit costs likely between $100 and $500.
- Coordinate pool and kitchen utility trenching during initial construction to avoid costly rework and utility runs that could cause corrosion or installation errors later.
Table of Contents
- Poolside Outdoor Kitchen Ideas That Fit Your Yard
- How Far Apart Should the Grill, Sink, and Fridge Be?
- Materials and Appliances That Survive Pool Chemicals
- Shade Sail Ideas and Pergolas for Your Pool Area
- What Safety Clearances Does a Poolside Grill Need?
- What Does an Outdoor Kitchen by the Pool Cost?
- Questions to Ask Before You Hire a Builder
- What Hundreds of Pool Remodels Have Taught Us
- Storage That Actually Survives Outside
- Weatherproofing Tips That Extend the Life of Your Kitchen
- Waterproof Electrical Fixtures and Safety Around Water
- What Installers Wish Every Homeowner Knew
- Bring Your Outdoor Kitchen and Pool Remodel Together
- Sources
Poolside Outdoor Kitchen Ideas That Fit Your Yard
The layout you choose should follow the shape of your deck, not a magazine photo. Here’s how the four most common poolside outdoor kitchen designs stack up:
- One-wall layout: works for narrow decks or side yards where footprint is tight; everything lines up along a single run, which keeps plumbing and gas lines simple.
- L-shape layout: adds a second counter run for prep space and puts some visual separation between the cook and the crowd near the water.
- Island with bar seating: the most social option, since the cook faces outward and stays part of the pool activity instead of turning their back on it.
- U-shape or full kitchen: suited to bigger yards and bigger budgets, often the choice for households that entertain often or host large groups.
Feature pairings matter too. A pizza oven fits naturally into an L-shape or U-shape where there’s room to step back from the heat. A beverage center or backyard bar area tucks neatly into an island design, and a passthrough counter linking the kitchen patio by the pool to a shaded dining spot keeps food moving without anyone tracking wet feet across the whole space.
How Far Apart Should the Grill, Sink, and Fridge Be?
Borrow the classic kitchen work triangle. Place your grill, sink, and refrigerator so each leg of that triangle runs roughly 4 to 9 feet apart. Shorter than that and you’re bumping elbows; longer and you’re walking laps every time you plate a burger.
For bar seating, budget about 24 inches of width per stool with 12 to 15 inches of knee overhang so guests aren’t wedged against the counter edge. Beyond the numbers, follow three practical rules:
- Keep at least 3 feet of clear path between the cooking zone and the pool deck’s main walking lanes.
- Never position the grill where pool splash can reach it. Wet flare-ups and hot grease do not mix.
- Give the sink its own elbow room, separate from the grill, so two people can work at once without colliding.
Materials and Appliances That Survive Pool Chemicals
Chlorine, sun, and splash destroy standard cabinetry faster than most homeowners expect. Skip anything designed for an indoor kitchen and build around materials made for the outdoors:
- Cabinets: HDPE (high-density polyethylene) cabinets or masonry enclosures resist corrosion far better than wood or painted MDF, though masonry costs more upfront and HDPE is easier to clean.
- Countertops: porcelain, sealed concrete, and granite hold up to sun and moisture; standard indoor quartz and most marble aren’t rated for constant UV and chlorine exposure and will discolor or crack.
- Appliances: choose refrigerators and grills built specifically for outdoor installation, not indoor units tucked under a counter. If the kitchen sits uncovered or close to the water, add wind guards or extra venting so burners stay lit in a breeze.
Pro Tip: Ask your cabinet supplier whether the hardware, hinges included, is rated for outdoor or marine use. A beautiful HDPE cabinet with indoor-grade hinges will still rust at the joints within a season.
Shade Sail Ideas and Pergolas for Your Pool Area
Shade changes how often you actually use a poolside kitchen. Full sun turns a 2 PM cookout into a 6 PM cookout, so where and how you shade matters as much as what material you pick.
- Over the swim zone: use breathable HDPE shade fabric, which vents heat and prevents water pooling on the sail itself.
- Over dining and seating: waterproof fabric works better here, since runoff can be engineered to drain away from furniture instead of onto swimmers.
- Priority order: shade the steps, shallow end, and seating first. Covering the entire pool surface is rarely necessary or affordable.
Shade sail hardware guidance consistently points to marine-grade stainless and engineered footings for a reason: a sail that rips loose in a storm becomes a hazard, not a feature. If you’d rather skip fabric altogether, a covered pavilion or pergola gives permanent shade and protects appliances from sun damage year-round.
What Safety Clearances Does a Poolside Grill Need?
Grills and pools both come with their own safety rules, and a poolside kitchen has to satisfy both at once.
- Leave clearance on both sides of a built-in grill and roughly 36 inches of vertical space above it, though your local code should always have the final word.
- Every outdoor cooking space near water needs GFCI-protected outlets, dedicated circuits, and weatherproof covers on every fixture.
- Keep electrical outlets at the code-required distance from the water’s edge. This isn’t a place to improvise.
- Use slip-resistant paving around the cooking area and slope it away from the pool so grease and water don’t pool underfoot.
- Route drainage so puddles never sit directly under or beside the grill station.
What Does an Outdoor Kitchen by the Pool Cost?
Budgets swing wildly based on appliances and structure, so it helps to think in bands rather than a single number.
- Basic setup: starting around $5,000 for a simple grill island with minimal finishes.
- Mid-range build: $15,000 to $30,000 typically covers a full outdoor cooking space with quality countertops and a couple of appliances.
- Luxury project: $50,000 and up, usually once premium appliances, stonework, and a covered structure enter the picture.
Permits often run $100 to $500 depending on scope, but the bigger cost risk is skipping the permit conversation entirely. Gas lines, permanent plumbing, and new electrical circuits almost always trigger a building permit review, so check with your local building department before signing a contract, not after.
Efficiency tip: while trenching is open for the pool or kitchen, run extra conduits and capped water lines for future add ons. Retrofitting a beverage fridge or a second burner two years from now costs far more once the concrete has cured.
Questions to Ask Before You Hire a Builder
Coordinating a kitchen build with pool construction, or with an existing pool, saves money and headaches if you get the sequencing right.
- Will trenching for the kitchen’s utilities happen at the same time as any pool work, so you’re not paying to open the same ground twice?
- Can the contractor stub in extra conduits and water lines now for appliances you might add later?
- Will you get layout drawings showing clearances, ventilation routes, and exactly where plumbing and electrical lines run before you sign anything?
The most common pitfalls installers see: appliances placed too close to splash zones, cabinet hardware that isn’t rated for a chlorinated environment, and kitchens built with zero room for a future expansion. A little coordination up front, guided by resources like this planning checklist, avoids all three.
What Hundreds of Pool Remodels Have Taught Us
We Fix Ugly Pools® has spent a decade turning unsightly, outdated pools into backyards people actually want to use, and outdoor kitchens come up in nearly every consultation. The recurring fixes we see when a kitchen gets added to an existing pool: drainage that wasn’t sloped correctly, cabinet hardware that corroded within a year because it wasn’t marine-grade, and utility runs that got installed twice because nobody planned ahead. Running electrical, gas, and water lines once, during the pool work itself, is almost always cheaper than doing it after the fact.
Storage That Actually Survives Outside
Standard kitchen drawers and cabinets weren’t built for pool chemicals, humidity, or summer heat swings, so storage needs its own outdoor-specific approach.
Sealed HDPE drawers keep towels, utensils, and grilling tools dry and free of the swelling that plagues wood cabinetry near water. For anything metal, look for stainless steel drawer boxes rather than painted steel, since paint chips and exposes bare metal to rust within a season or two. Built-in coolers or drawer-style refrigeration units solve two problems at once: they keep drinks cold without a bulky standalone unit, and they free up counter space for actual food prep.

Vertical storage matters more poolside than in a typical kitchen. Wall-mounted or overhead storage keeps pool toys, extra towels, and cushions off the ground and away from splash, which also cuts down on mildew. If your kitchen sits uncovered, choose cabinets with adequate ventilation. A sealed box that traps humidity is a mildew problem waiting to happen. And skip particleboard or MDF entirely. Once poolside humidity gets into the seams, no amount of sealant reverses the swelling.
Weatherproofing Tips That Extend the Life of Your Kitchen
An outdoor cooking space near a pool takes more abuse than a typical patio, between chlorine splash, direct sun, and seasonal temperature swings. A little maintenance now prevents a full rebuild in five years.
Reseal stone or concrete countertops annually, since UV exposure and pool chemicals both break down sealants faster than they would on an indoor surface. Check stainless steel appliances and hardware for early corrosion at least twice a year. Catching a small rust spot early is a five-minute fix; ignoring it usually means replacing the whole panel later. Cover grills and refrigeration units during the off-season or heavy storms, even outdoor-rated ones benefit from reduced direct exposure to wind-driven rain.

Inspect grout lines and joints where water tends to collect, since standing moisture is what actually causes long-term structural damage, not the occasional splash. If your kitchen sits under a pergola or shade sail, clean debris off the structure regularly so runoff doesn’t pool directly onto countertops or appliances below.
Waterproof Electrical Fixtures and Safety Around Water
Electrical work near a pool carries real risk, and it’s the one area where cutting corners is genuinely dangerous, not just costly.
Every outlet, switch, and light fixture in a poolside kitchen needs a weatherproof, in-use rating, meaning the cover stays closed and protective even with a cord plugged in. GFCI protection is required on every circuit near water, and it should be on a dedicated circuit separate from the rest of the house wiring. Lighting fixtures need a wet-location rating, not just a “damp location” rating, since direct splash and rain both hit a poolside kitchen regularly.
Keep any outlet or switch the required code distance from the water’s edge, and never rely on extension cords as a permanent wiring solution near a pool. If your kitchen includes under-counter lighting or accent lighting along a bar area, low-voltage LED systems are both energy-efficient and inherently safer near water than standard line-voltage fixtures. When in doubt, this is the one section of a poolside kitchen build where hiring a licensed electrician isn’t optional. It’s the difference between an evening cookout and a serious hazard.
What Installers Wish Every Homeowner Knew
The cover versus open debate comes up on nearly every project, and a simple pergola or pavilion almost always wins that argument. It extends usable hours by shading the cook and protecting finishes from sun damage. The splurges worth their cost are a quality grill, durable counters, and a beverage fridge. The extras that usually go unused are outdoor TVs and specialty gadgets nobody reaches for twice.
— Brian
Bring Your Outdoor Kitchen and Pool Remodel Together
Coordinating a new kitchen with pool work isn’t just about scheduling, it’s about avoiding the rework and corrosion problems installers see over and over. A single contractor handling both sides of that equation can plan trenching, plumbing, and electrical routing once instead of twice.

Experience focused on transforming pools can carry over into planning the outdoor cooking space next to them. Whether adding custom pool features, a new grill island, or a full backyard renovation, an experienced professional can walk your site, flag clearance and drainage issues before they become expensive problems, and build a plan that fits your yard and budget. If you’re ready to talk through what’s possible for your pool and kitchen together, request a consultation on our pool remodeling page and we’ll help you map out the next step.
Sources
- Work triangle floor plan guidance
- How to choose right size and layout for your outdoor kitchen (Houzz)
- Pool Shade Sail Guide for Safer, Cooler Swimming Areas
- Shade sails for pools — UV protection & safety
- Outdoor pool kitchen: design and build


